Agency
What it is
Section titled “What it is”An agency allows for grouping of multiple properties under a single entity, simplifying access management, permissions, and other settings across multiple properties.
In development
Bulk editing features will also be introduced in future updates.
Create an agency
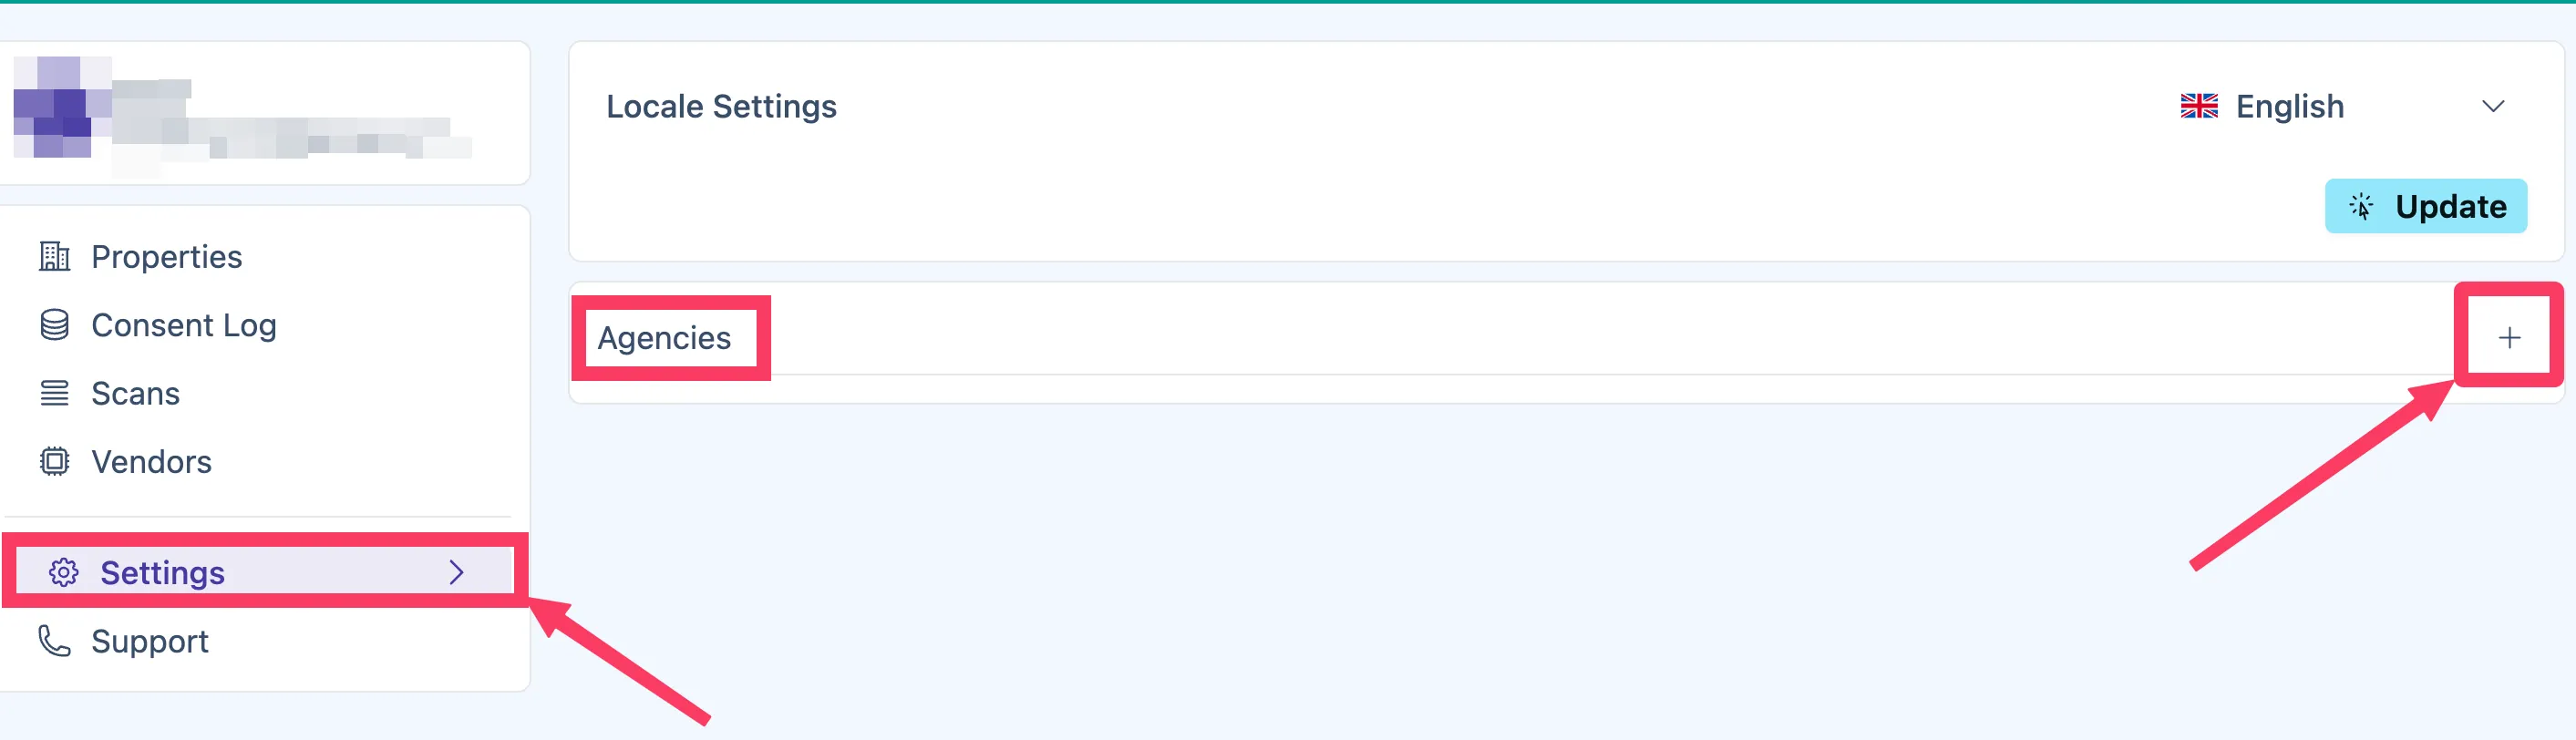
Section titled “Create an agency”To create an agency, navigate to Settings > Agencies > +:
Enter the agency name and optionally its URL and description:

Click Create.
Add users to an agency
Section titled “Add users to an agency”To add users to an agency, go to Settings > Agencies and select the relevant agency. Click +, then enter the user’s email and assign their permissions:
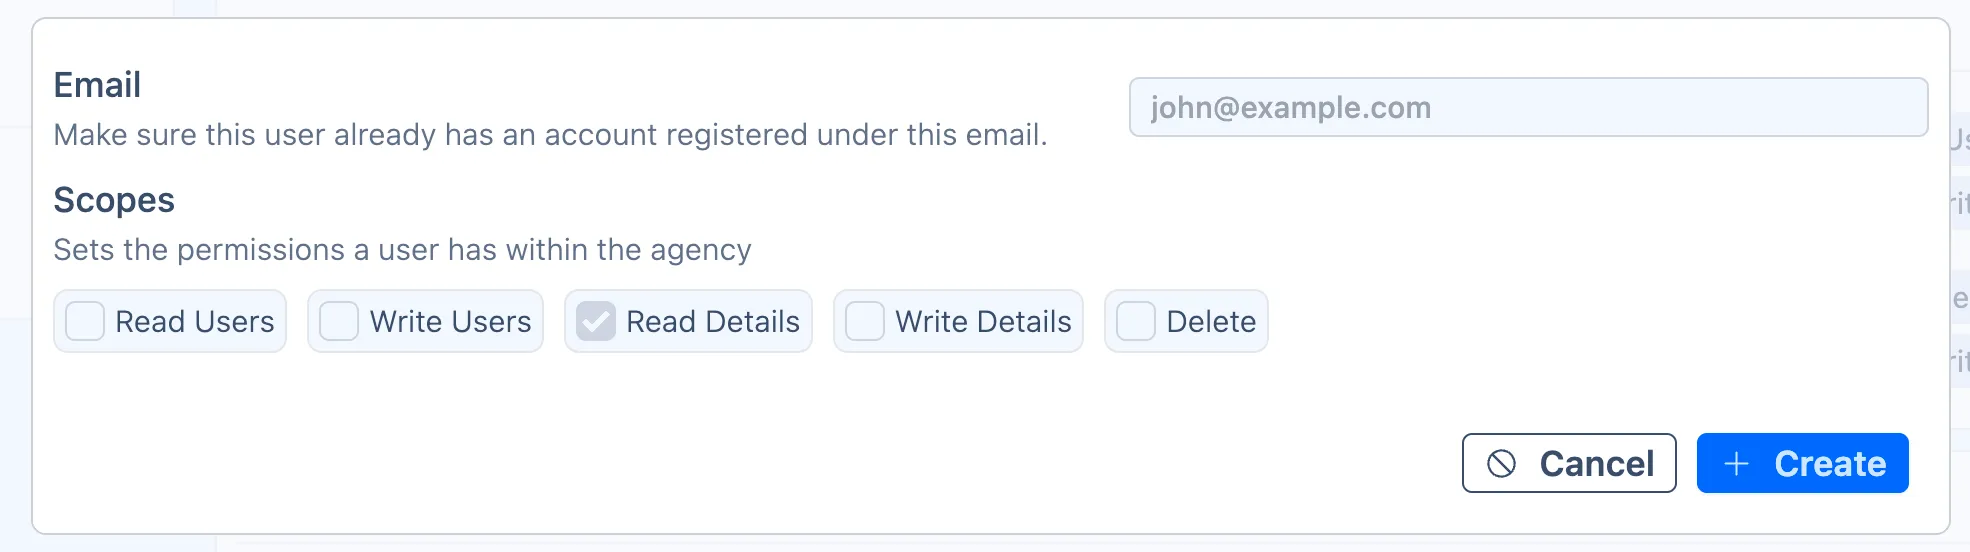
An invitation email will be sent to the user, which they have 14 days to accept.
Assign an agency to a property
Section titled “Assign an agency to a property”To link an agency to a property:
- Navigate to the relevant property’s Members > Create > Invite Agency.
- Search for the agency name, select it, and assign their permissions:
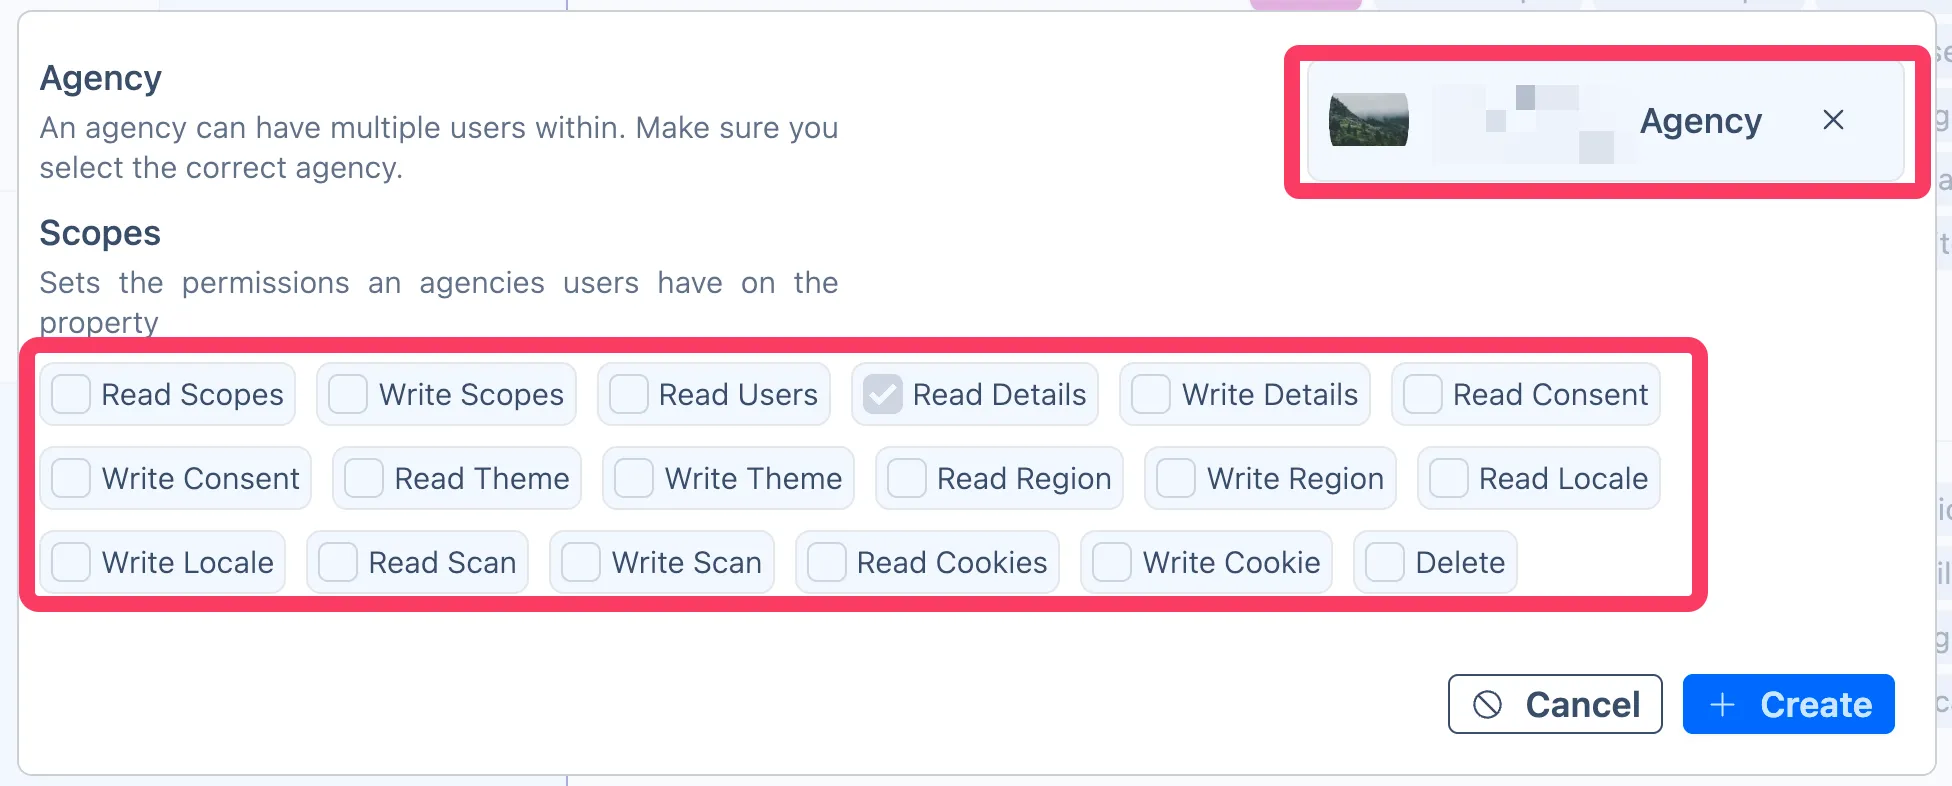
- Click Create.
The agency and all its members will now have access to the property with the assigned permissions.
Example
Section titled “Example”The Agency feature is particularly useful for:
- marketing agencies managing multiple client properties
- legal teams overseeing compliance across multiple properties
Use case scenarios
Section titled “Use case scenarios”If you’re
Marketing agency
If your agency manages multiple client websites, all your team members should create their own Cookifi accounts and be added to the agency by the agency owner.
As for your client, ask them to create their own Cookifi account & property and add your agency as a member (using your agency name).
This way, your team gains access without having to manually add each team member to every client property.