Configure your Cookifi property
Select your property in the top right menu to open its settings. This guide will walk you through configuring your Cookifi property.
General
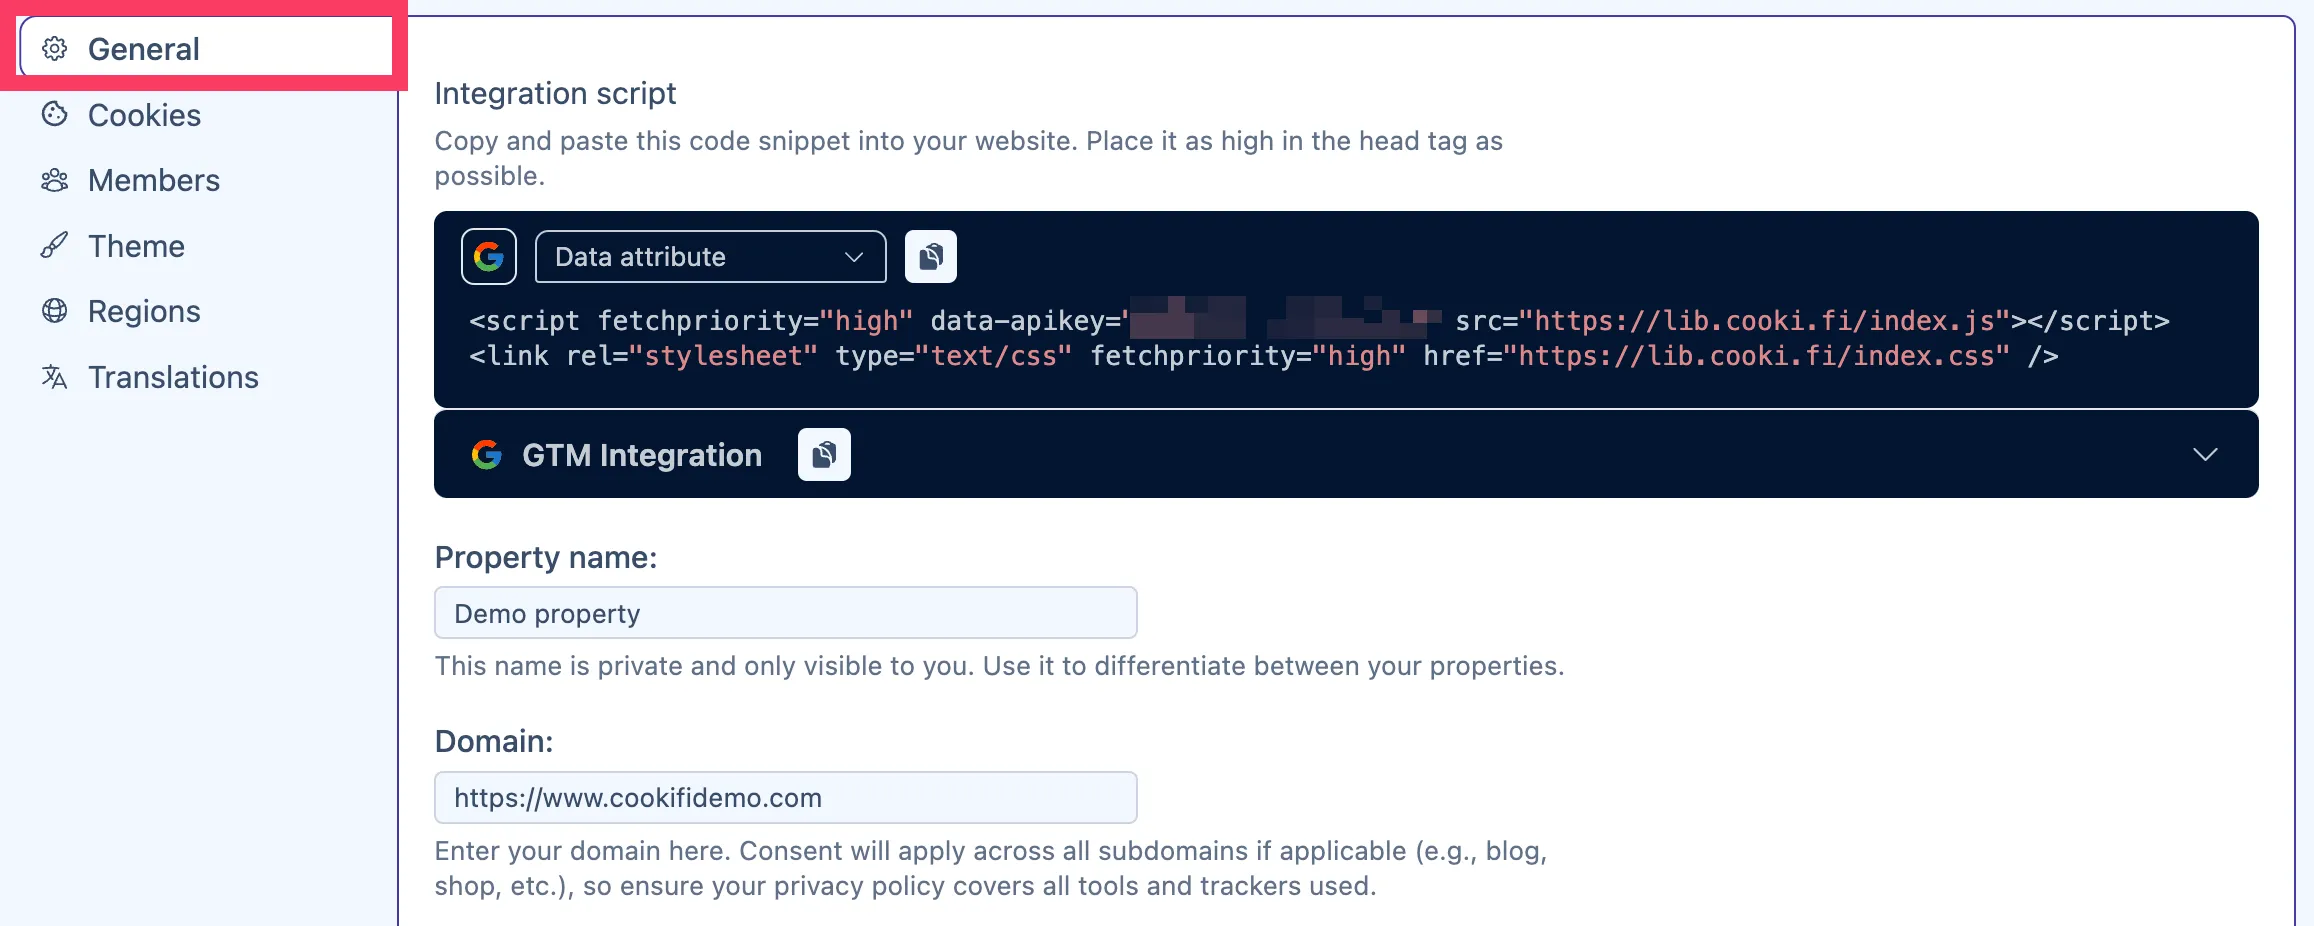
Section titled “General”The General section allows you to access your installation codes and update your property details, such as the name and domain.
Cookies
Section titled “Cookies”The Cookies section provides you with cookie suggestions, which are cookies we discovered are being set on your website. We automatically categorise these cookies into the relevant categories (e.g., marketing, analytics, etc.):
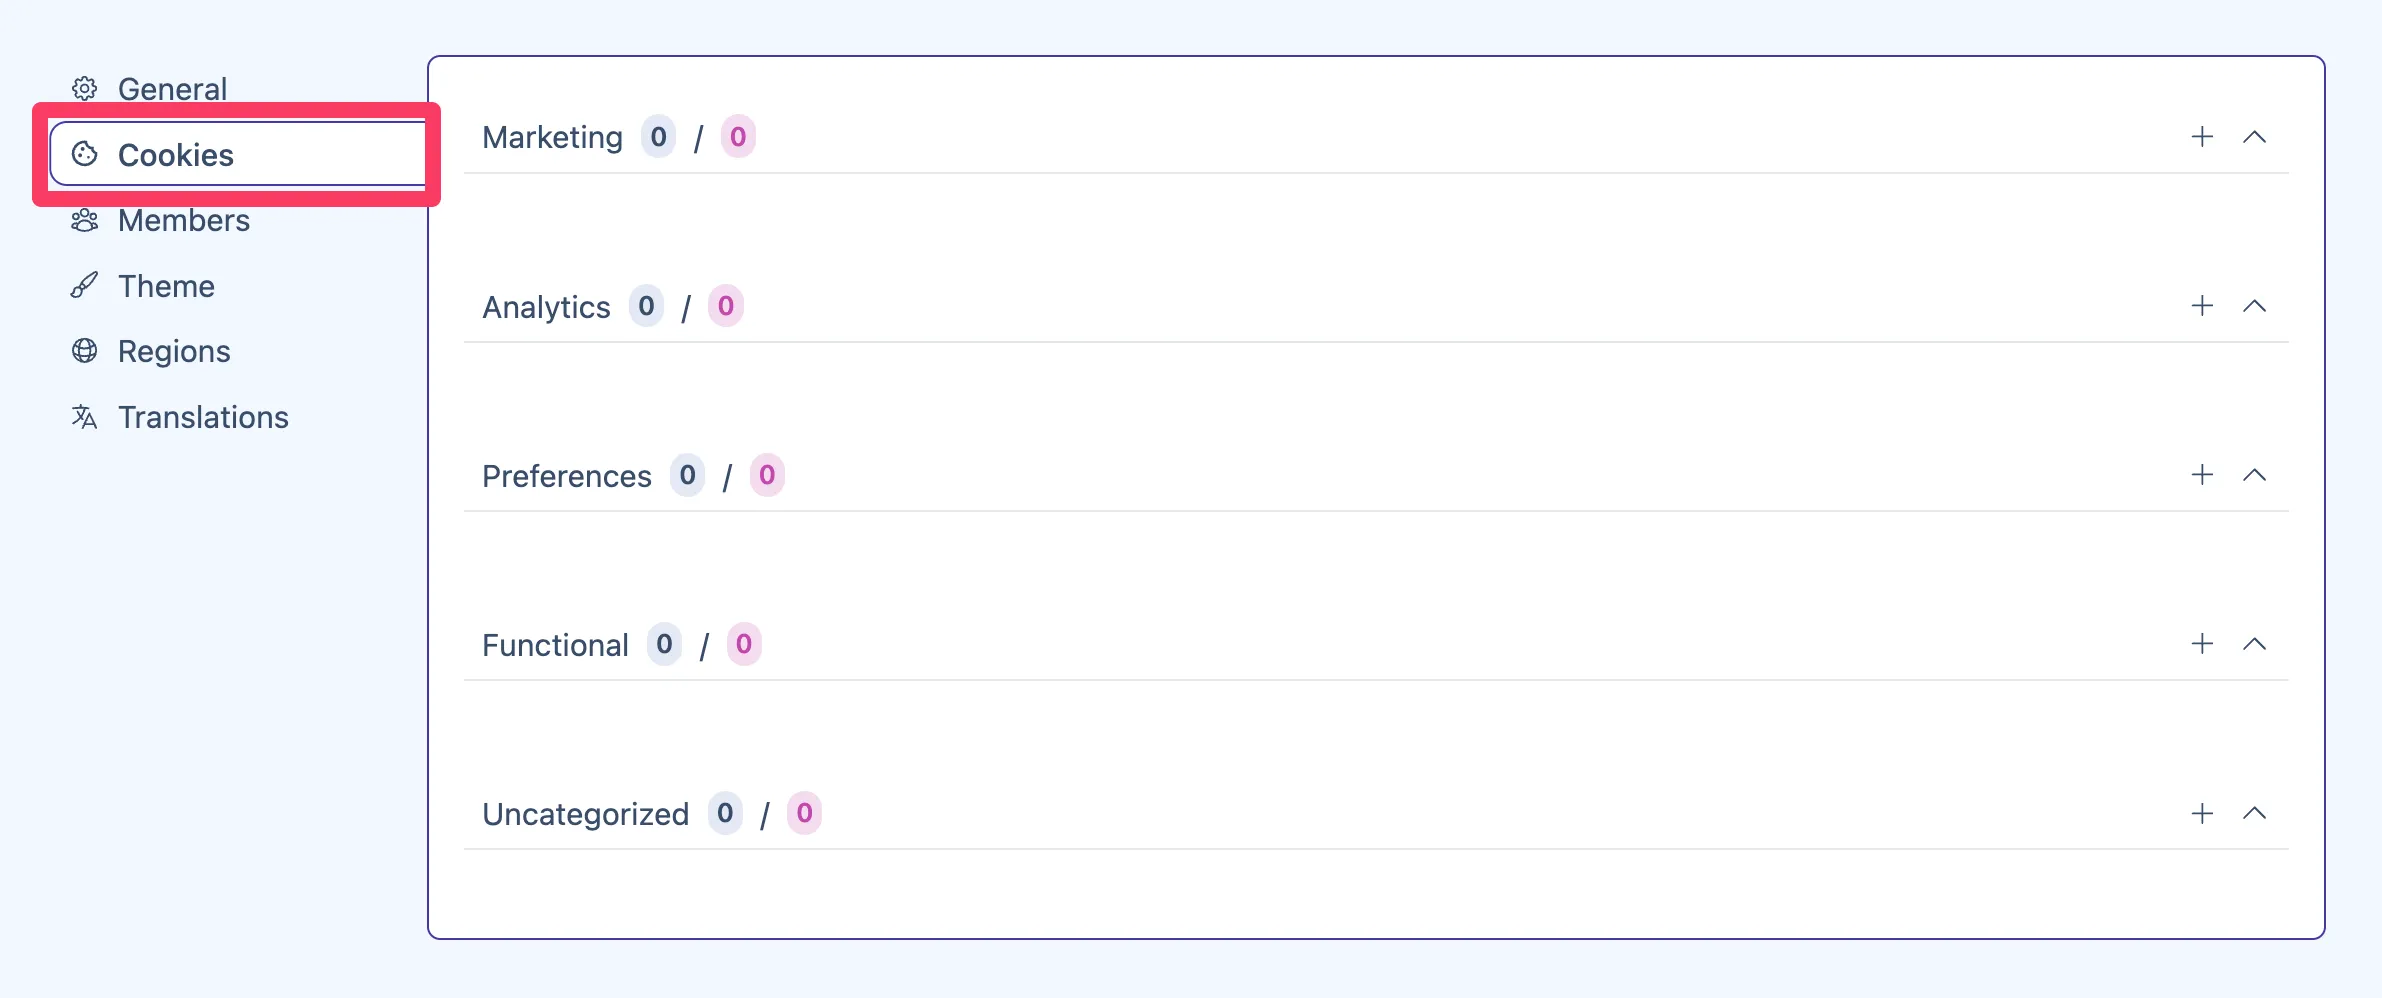
While we do our best to accurately categorise the cookies, we recommend reviewing them to ensure accuracy. You can modify any incorrect categorisations or other information.
Once you’re happy with the suggestion, click the green icon to approve it:
![]()
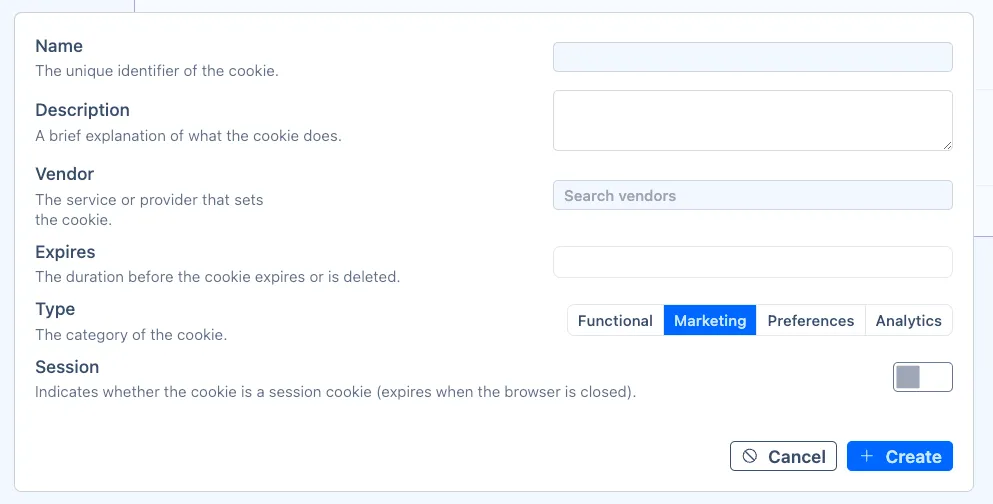
This opens the following popup, where you can enter the cookie details:
Members
Section titled “Members”The Members section lists all Users and Agencies that have access to the property.
You can add an individual user or an agency to your property by clicking the + icon:
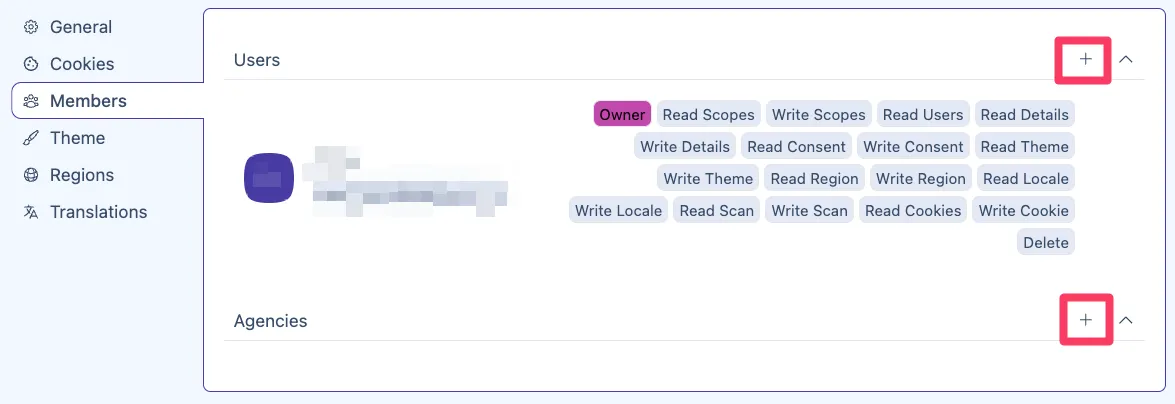
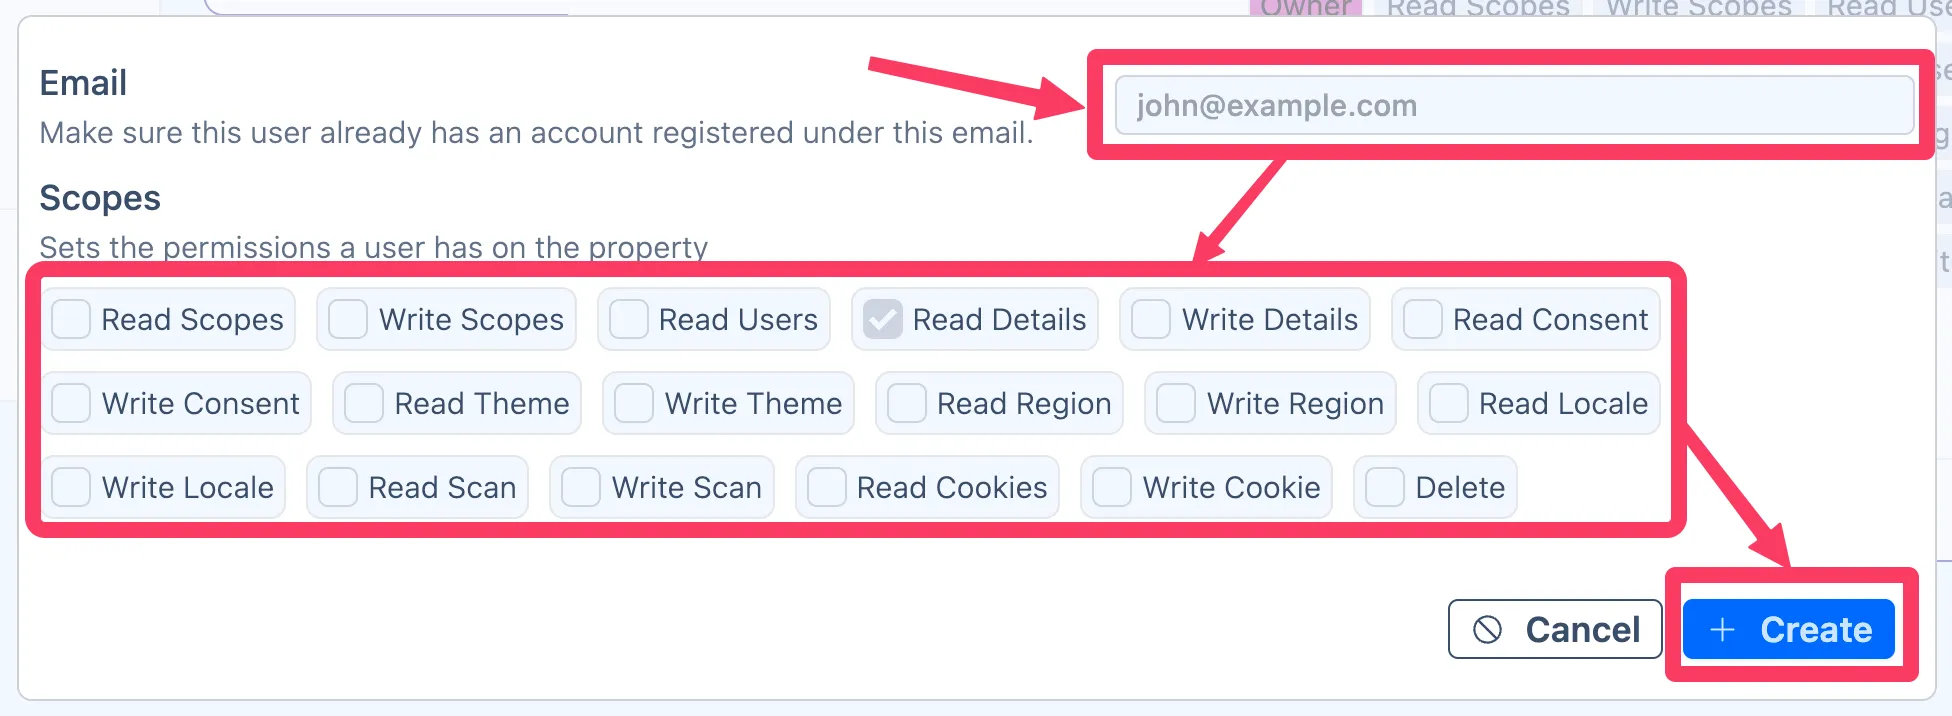
To add a user to your property, click the + icon next to Users, enter their email and set the suitable permissions:
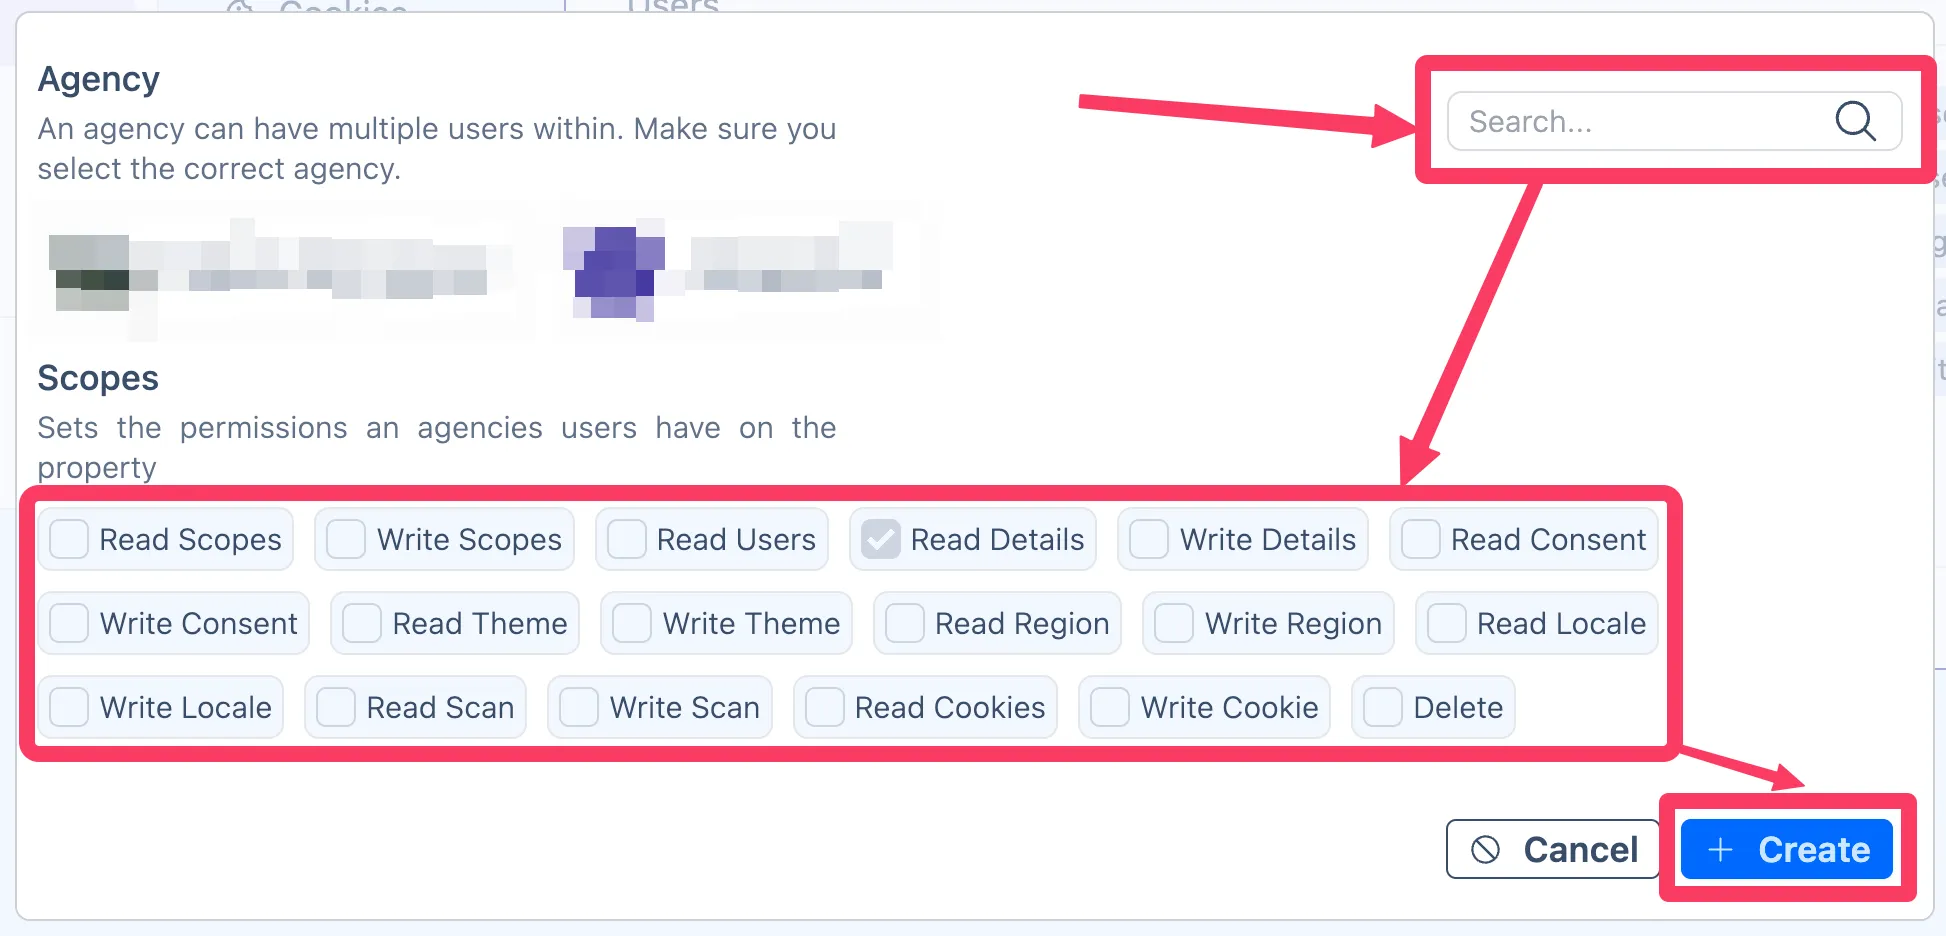
To add an agency to your property, click the + icon next to Agencies, search for the name of the desired agency, and set the suitable permissions:
In the Theme section, you can adjust the appearance of the cookie banner, including border radius, background, text colours, or even add custom CSS to match your website design:
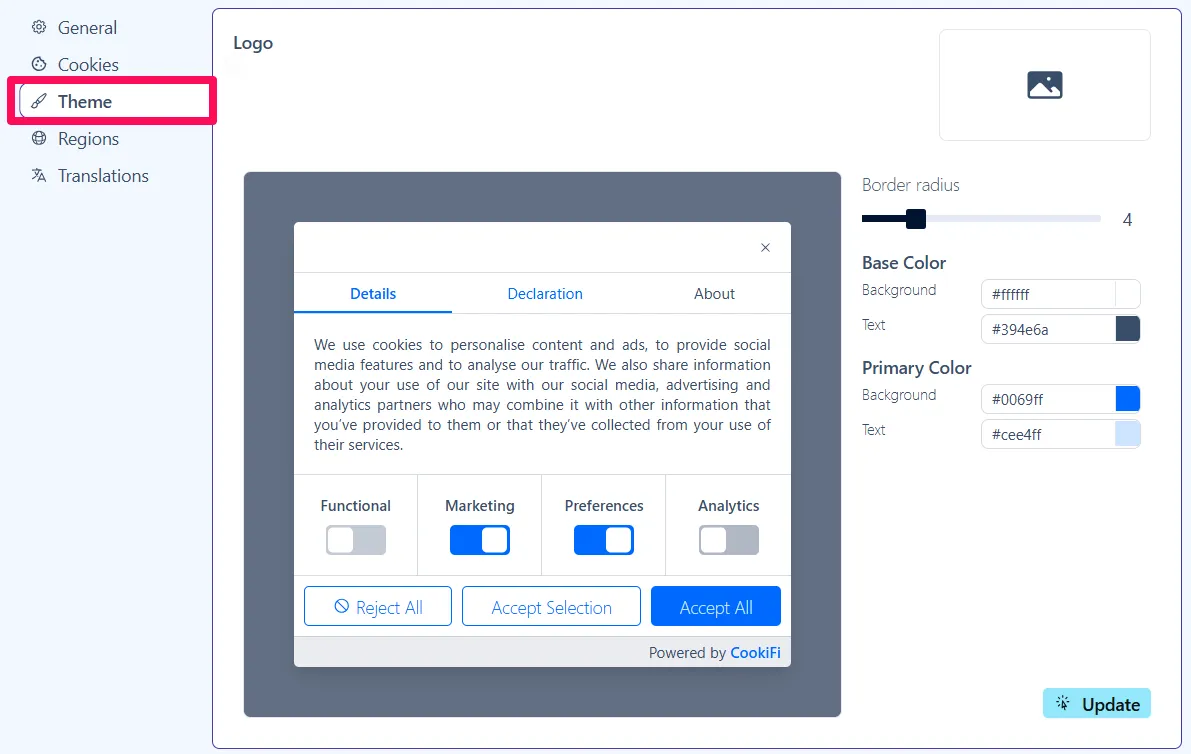
A real-time preview is displayed on the left.
To add your logo, click the following button:
![]()
Regions
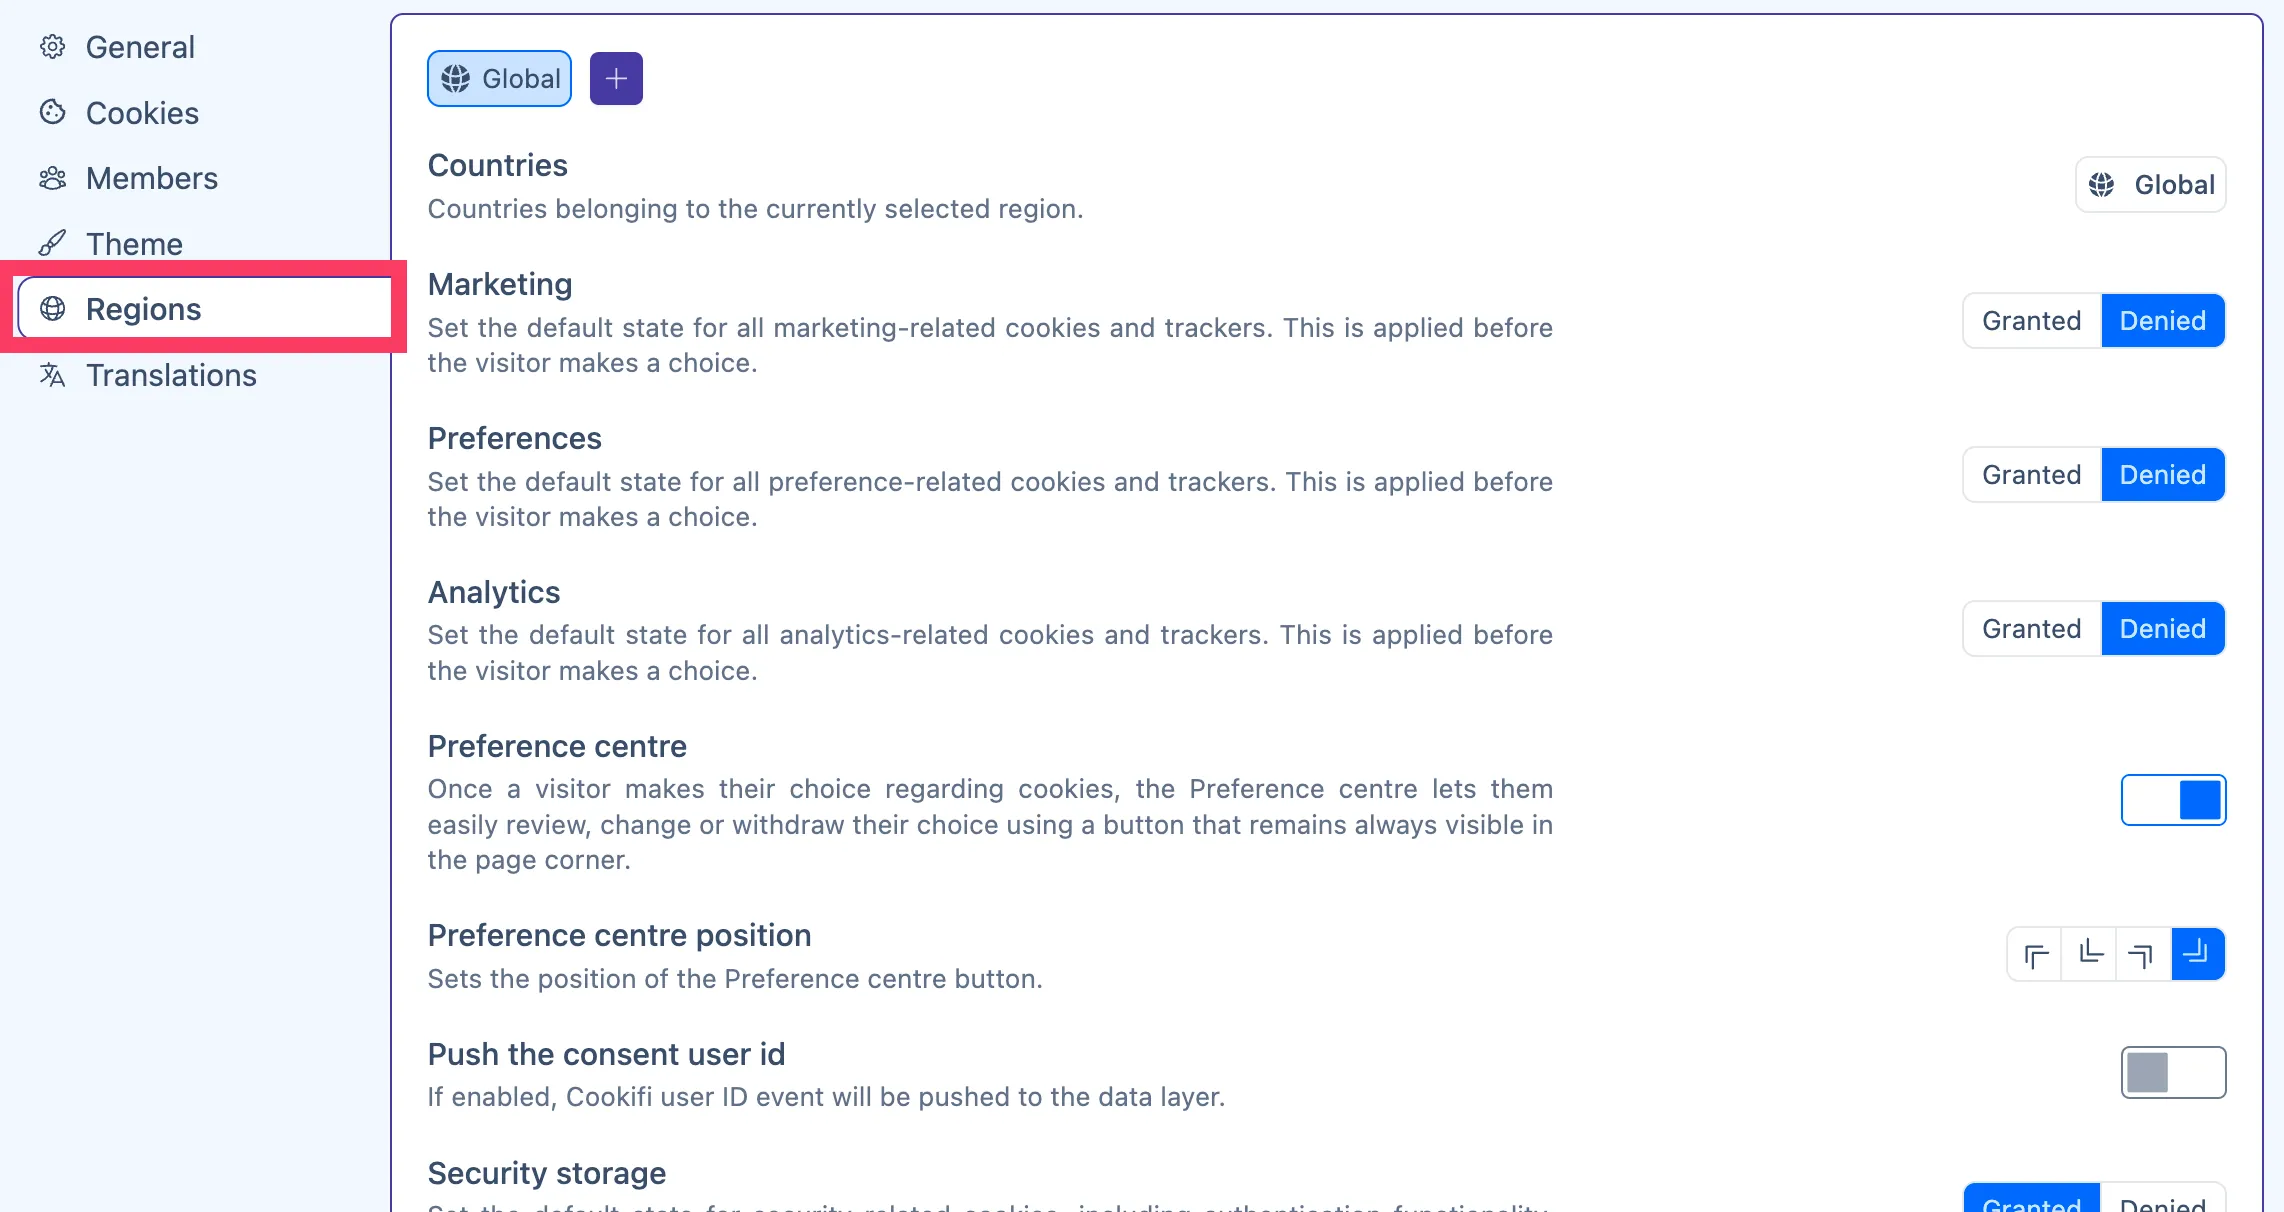
Section titled “Regions”The Regions section allows you to customise cookie banner behaviour based on a visitor’s location. This helps you comply with region-specific privacy laws.
Countries
Section titled “Countries”By default, a Global region is created for your property, applying to all visitors unless a more
specific region is added.
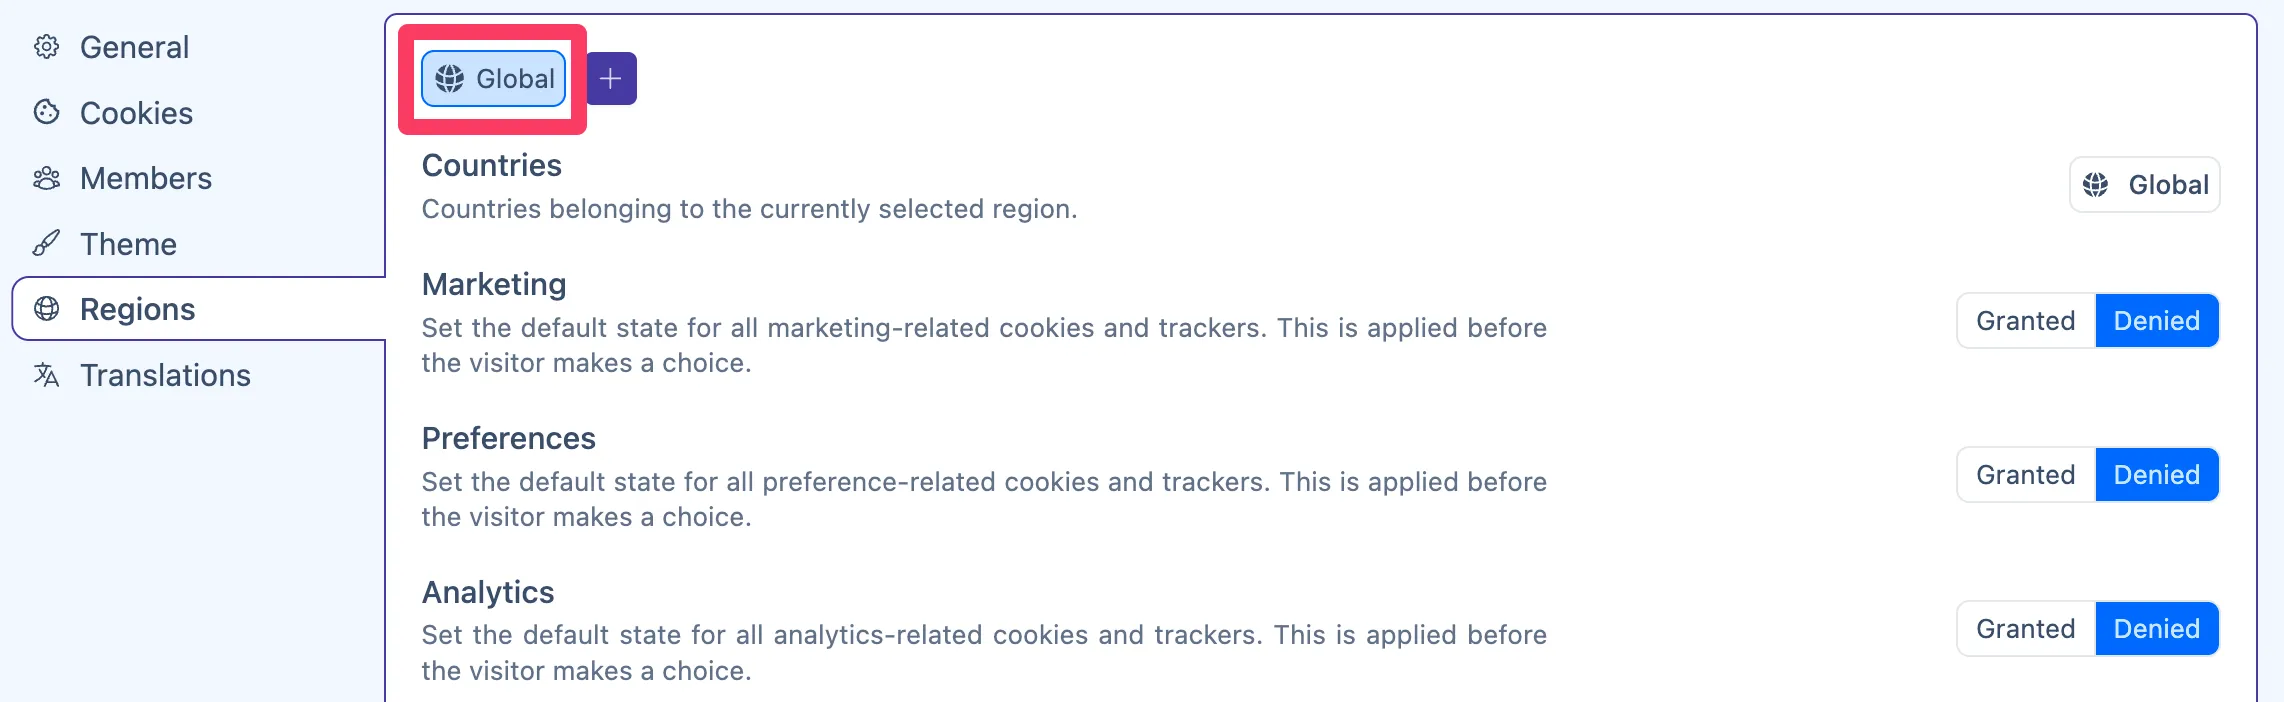
When you create a new region, it overrides global settings for visitors from that region.
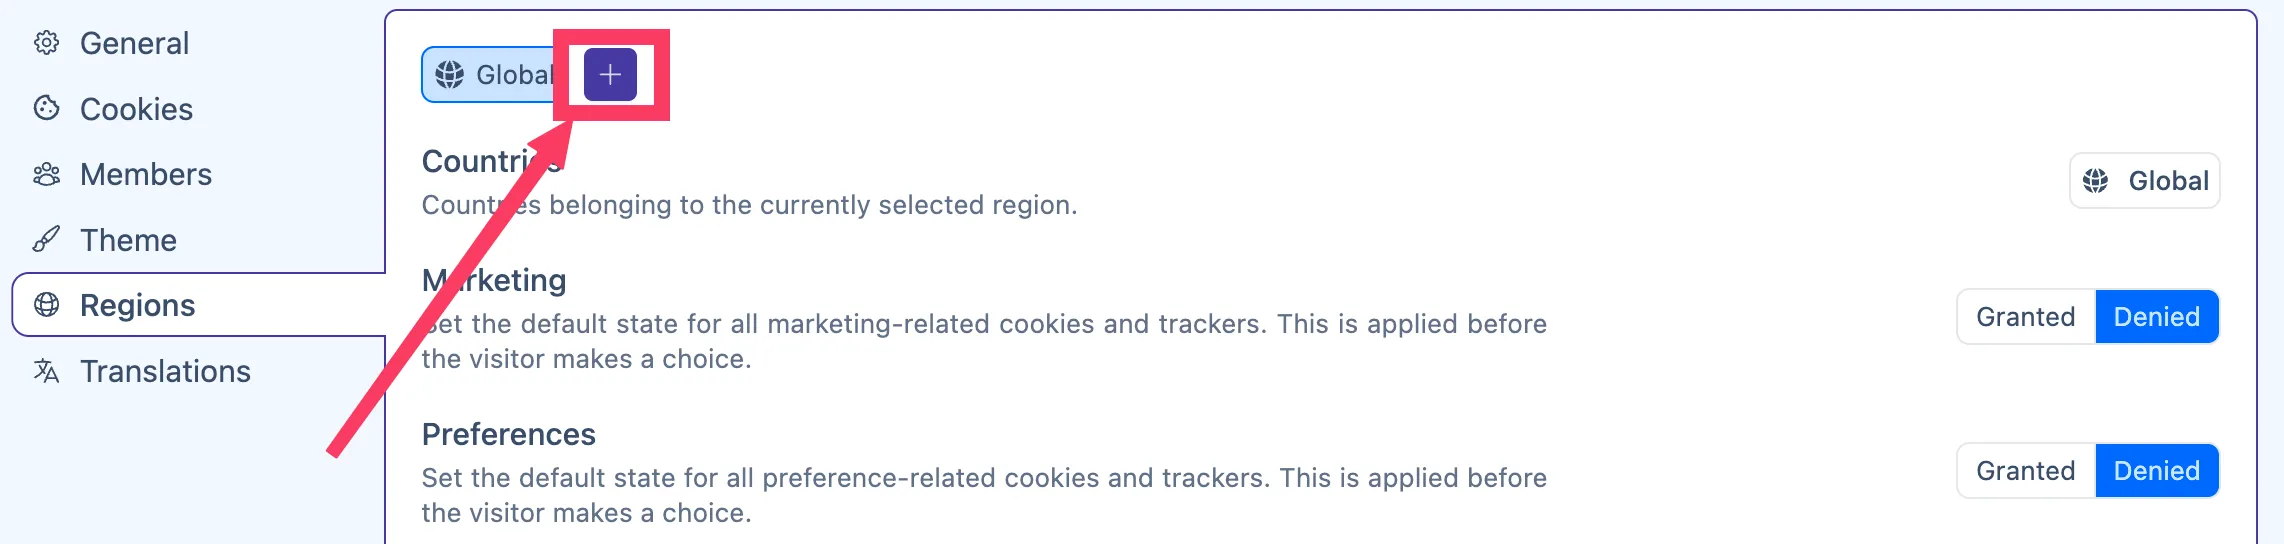
To create a new region:
-
Click the + icon:
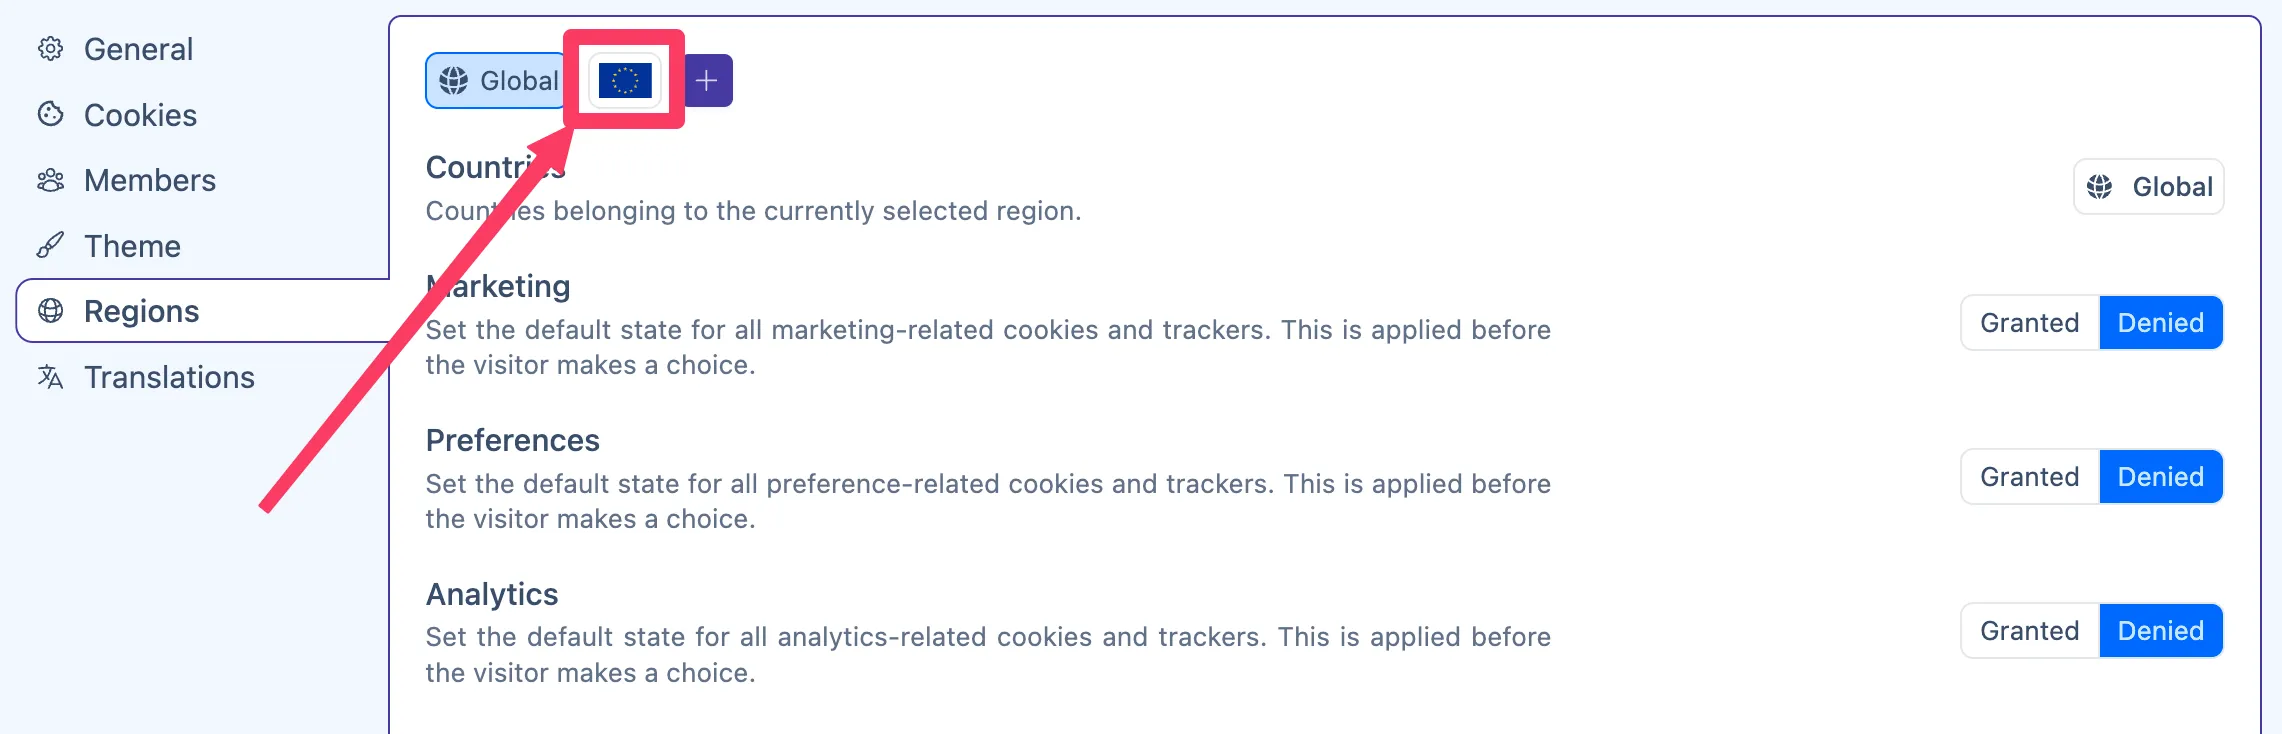
-
Search for a country or region (e.g., EEA - European Economic Area).
-
Click Create.

Once created, click the region’s icon to configure its settings:
Default consent values
Section titled “Default consent values”In each region settings, you’ll find three cookie categories: Marketing, Preferences, and
Analytics:
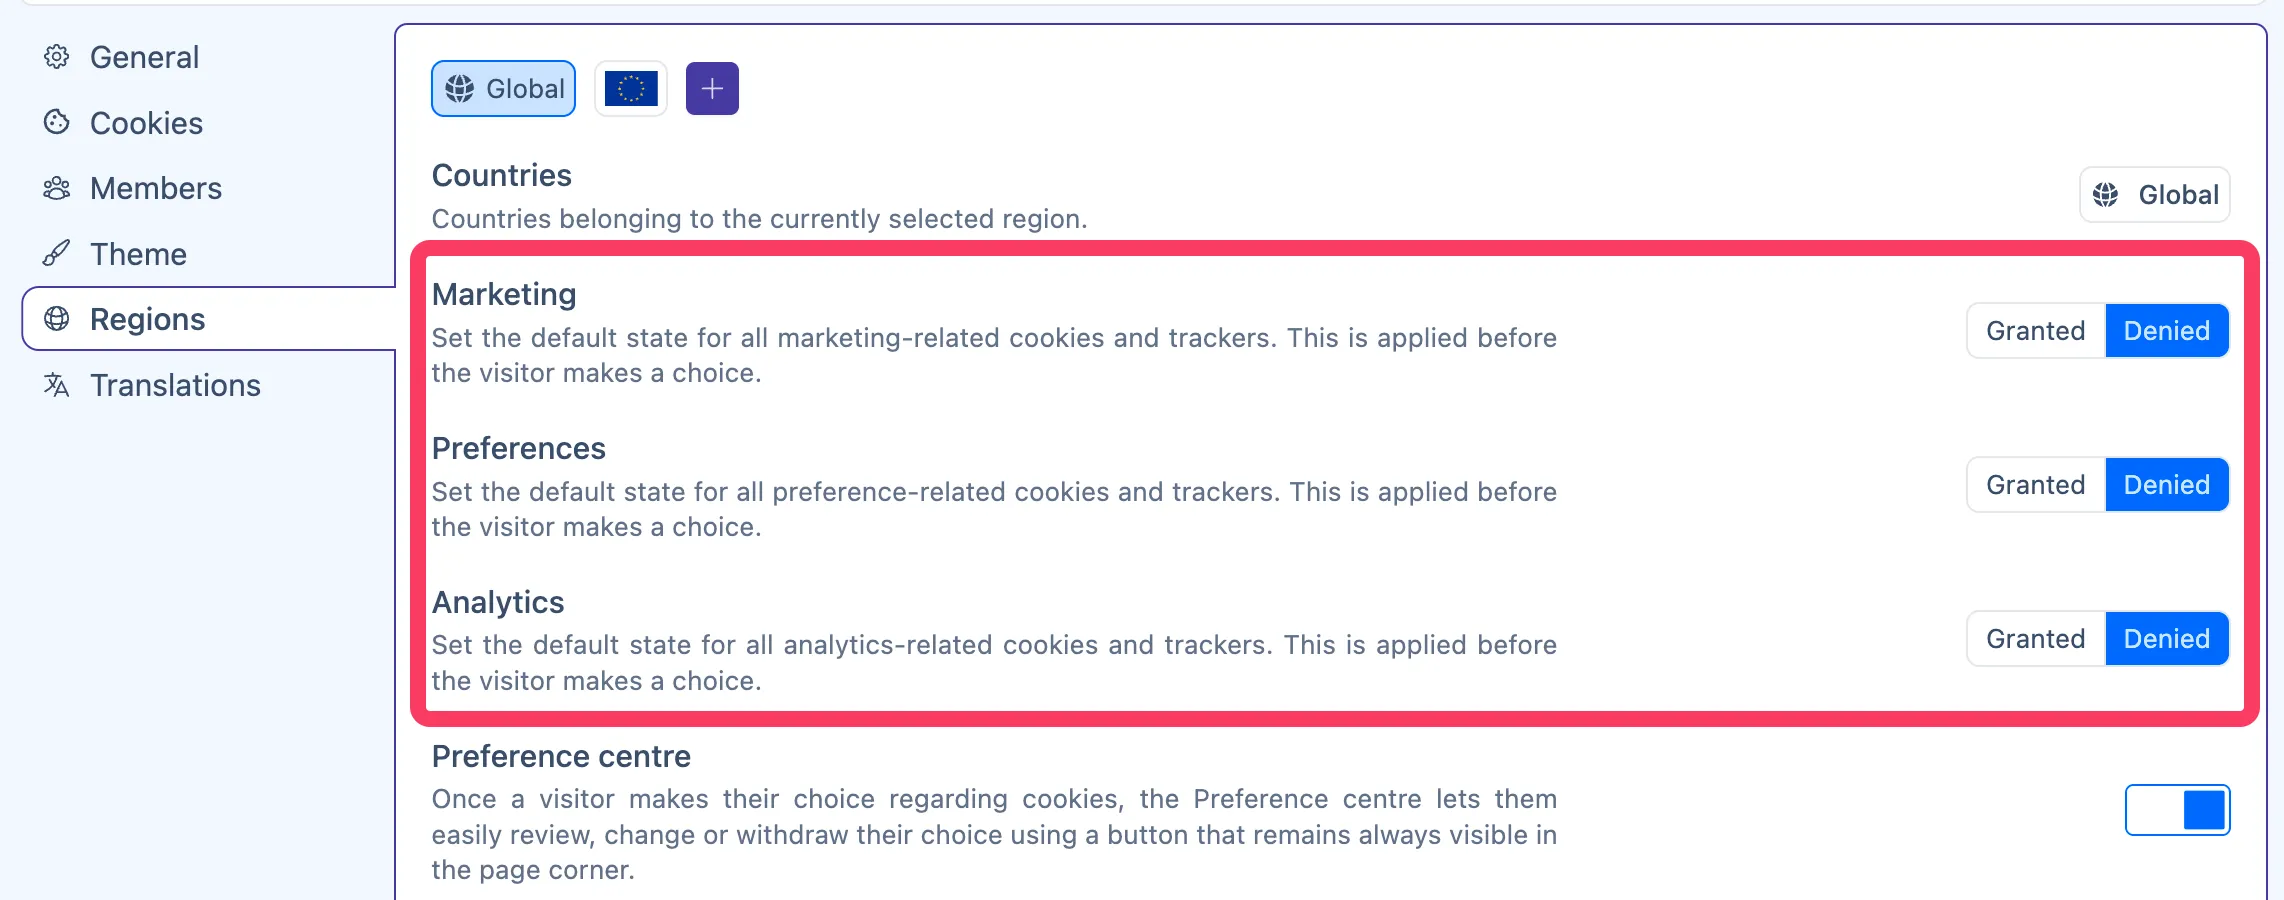
You can set each category’s default state to either Granted or Denied. These default values
apply until a visitor makes a choice. This allows you to treat each region differently based on its
privacy laws.
These values directly translate into the Google Consent Mode’s Default command categories and will also apply to any other future integrations.
Preference centre
Section titled “Preference centre”The Preference centre is a floating button that allows visitors to easily review or change their consent preferences at any time:
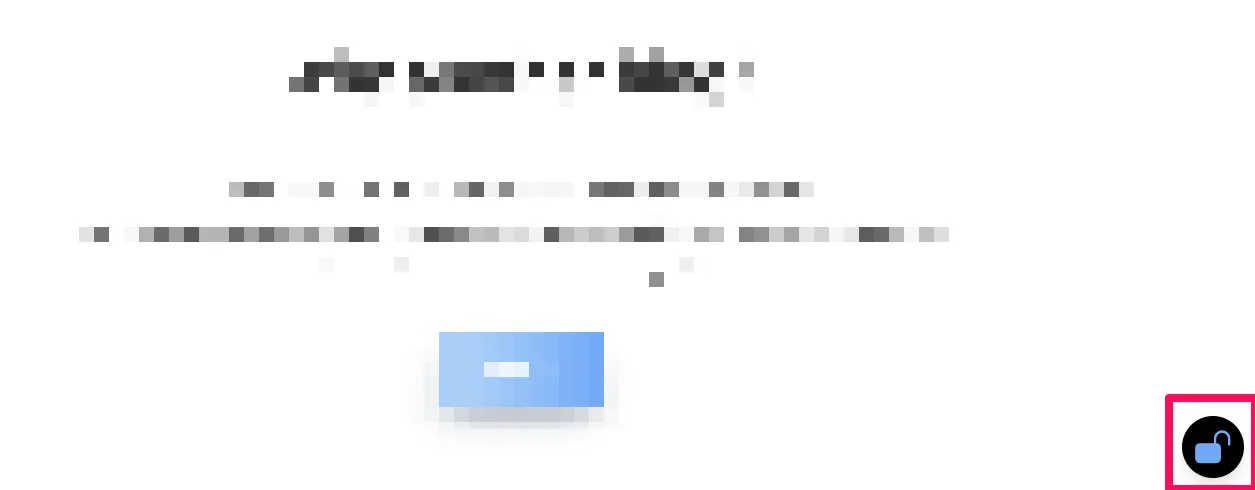
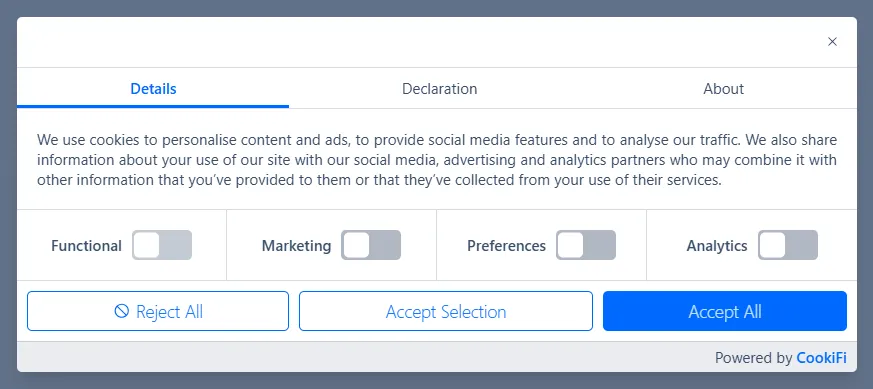
Clicking the Preference centre opens the Cookifi popup:
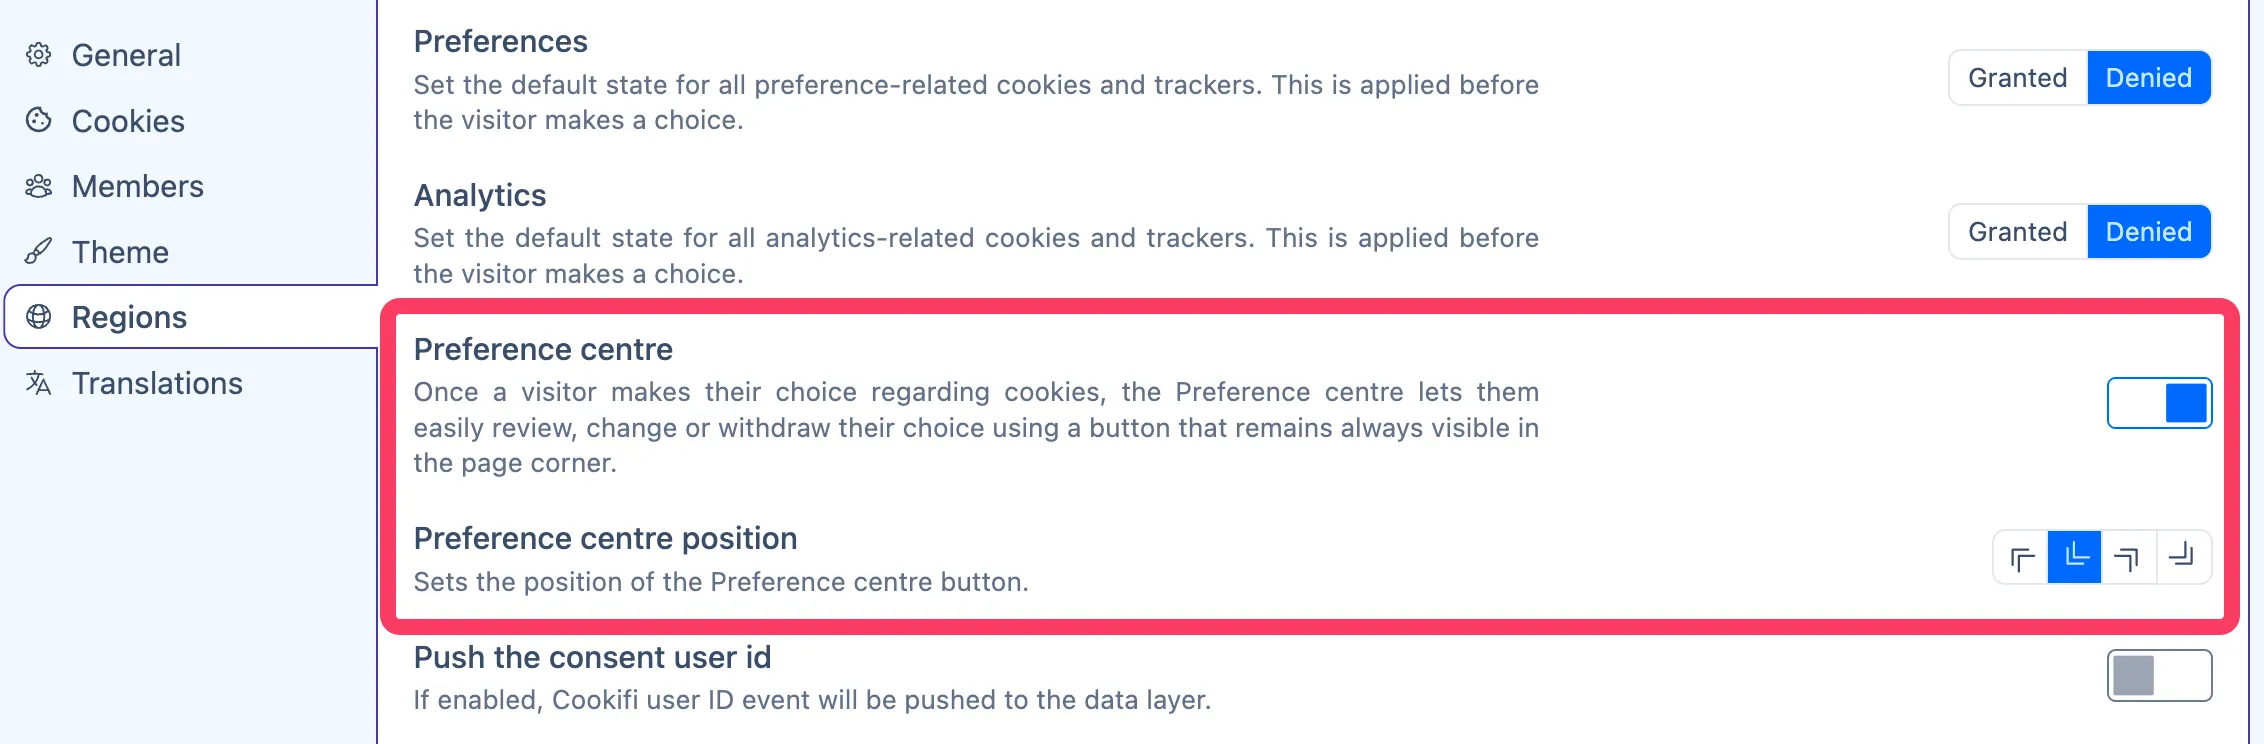
You can turn the Preference centre on or off, and adjust its position on the page:
Consent user ID
Section titled “Consent user ID”Cookifi can push a consent user ID into the data layer as an event:
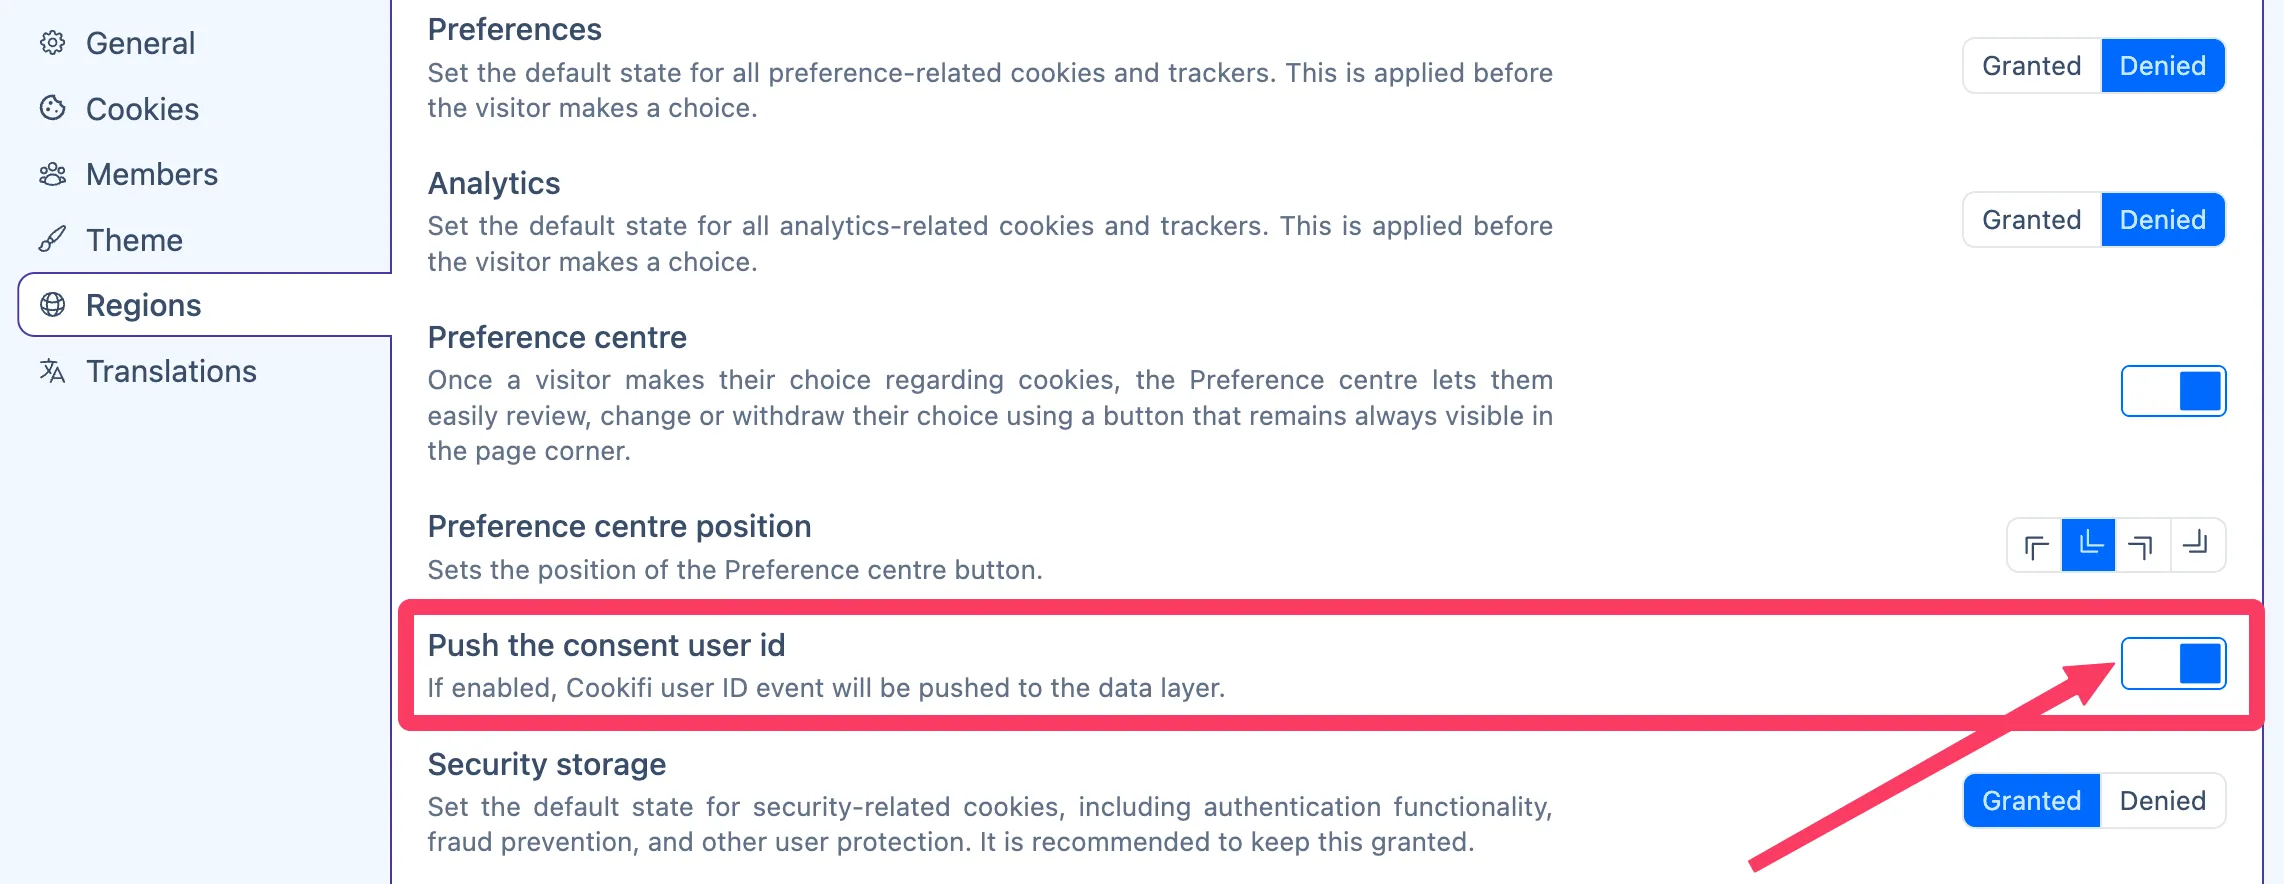
This allows you to retrieve the user ID using Google Tag Manager (GTM) and send it to analytics tools. If the tool supports data deletion mechanisms, you can request data removal for that user upon request.
To do this, open your GTM container.
-
Create a Custom Event trigger with the event name:
cookifi-consent-user-id: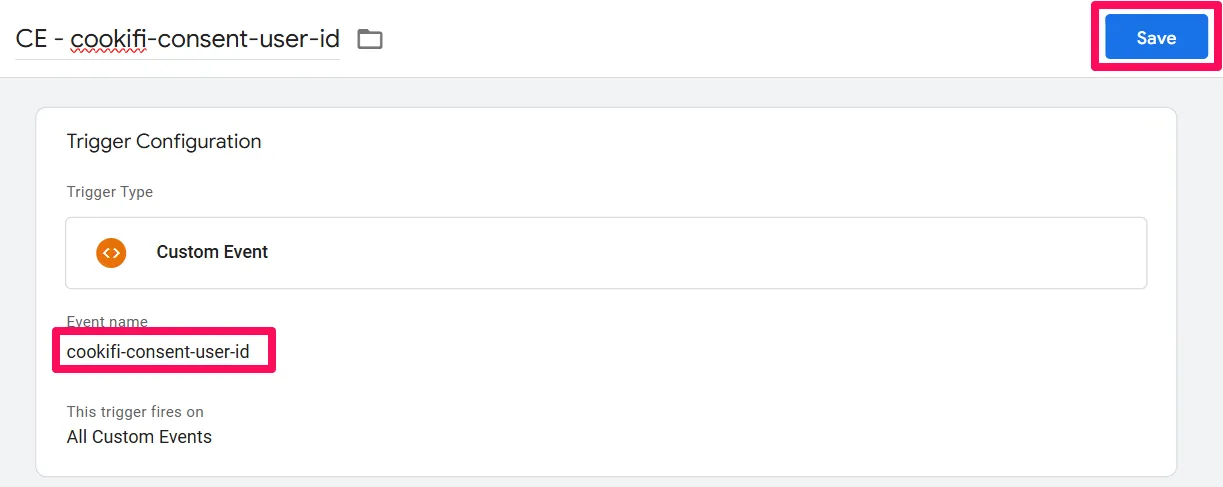
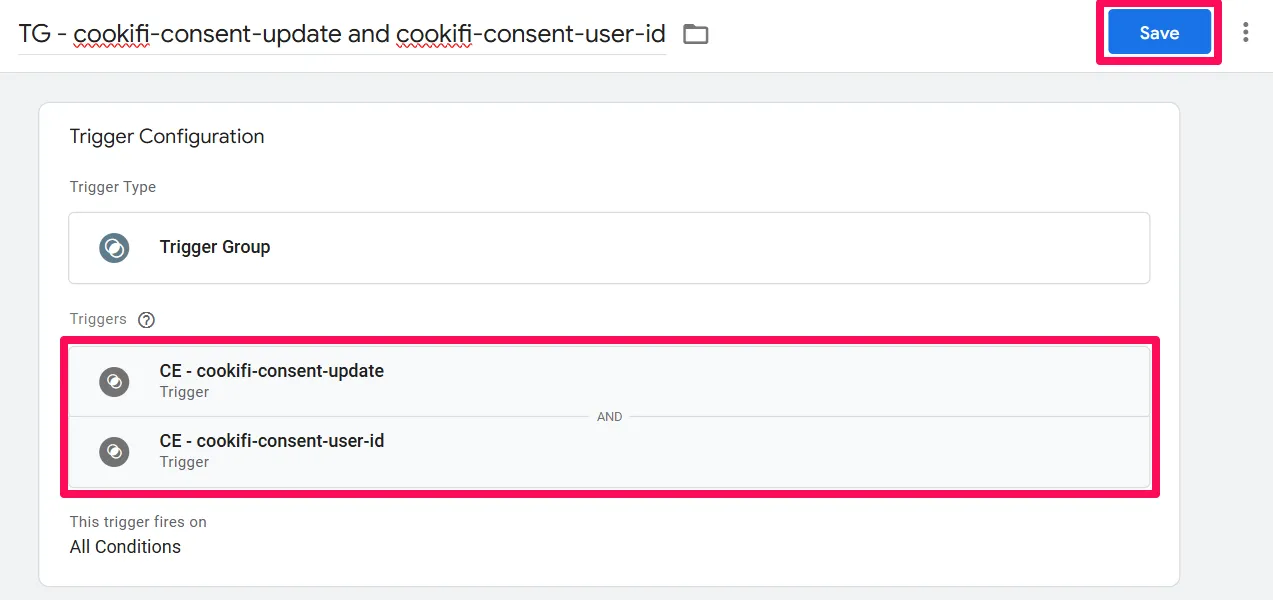
-
Create a Trigger Group trigger. Add your existing analytics trigger, and the newly created Custom Event trigger:
-
Create a Data Layer variable with the name:
cookifiUserId:
-
Add the variable to your analytics tag.
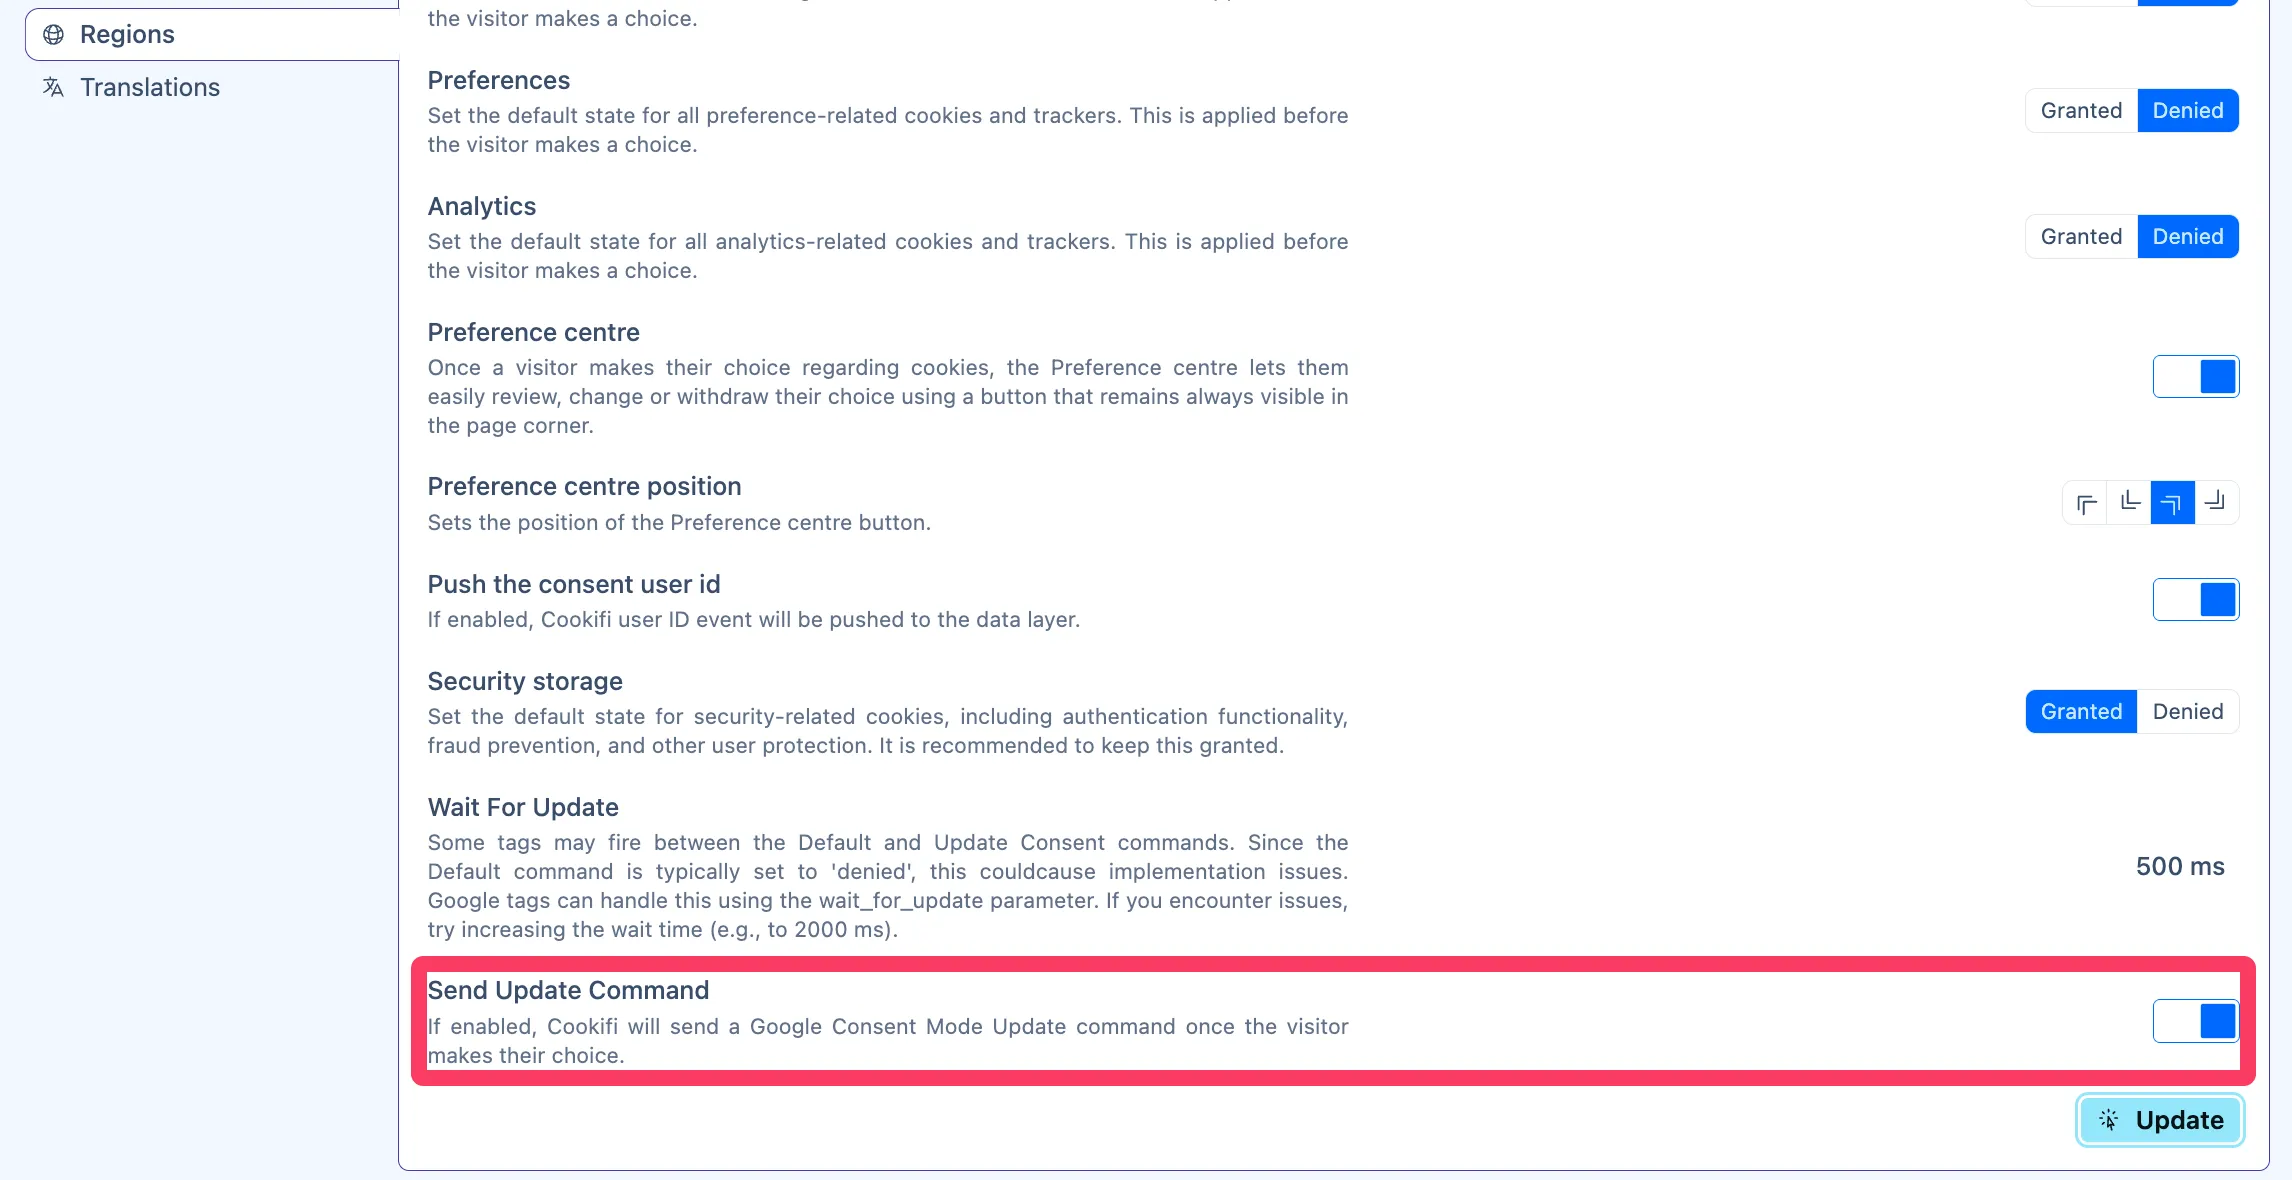
The following three settings apply to Google Consent Mode (GCM):
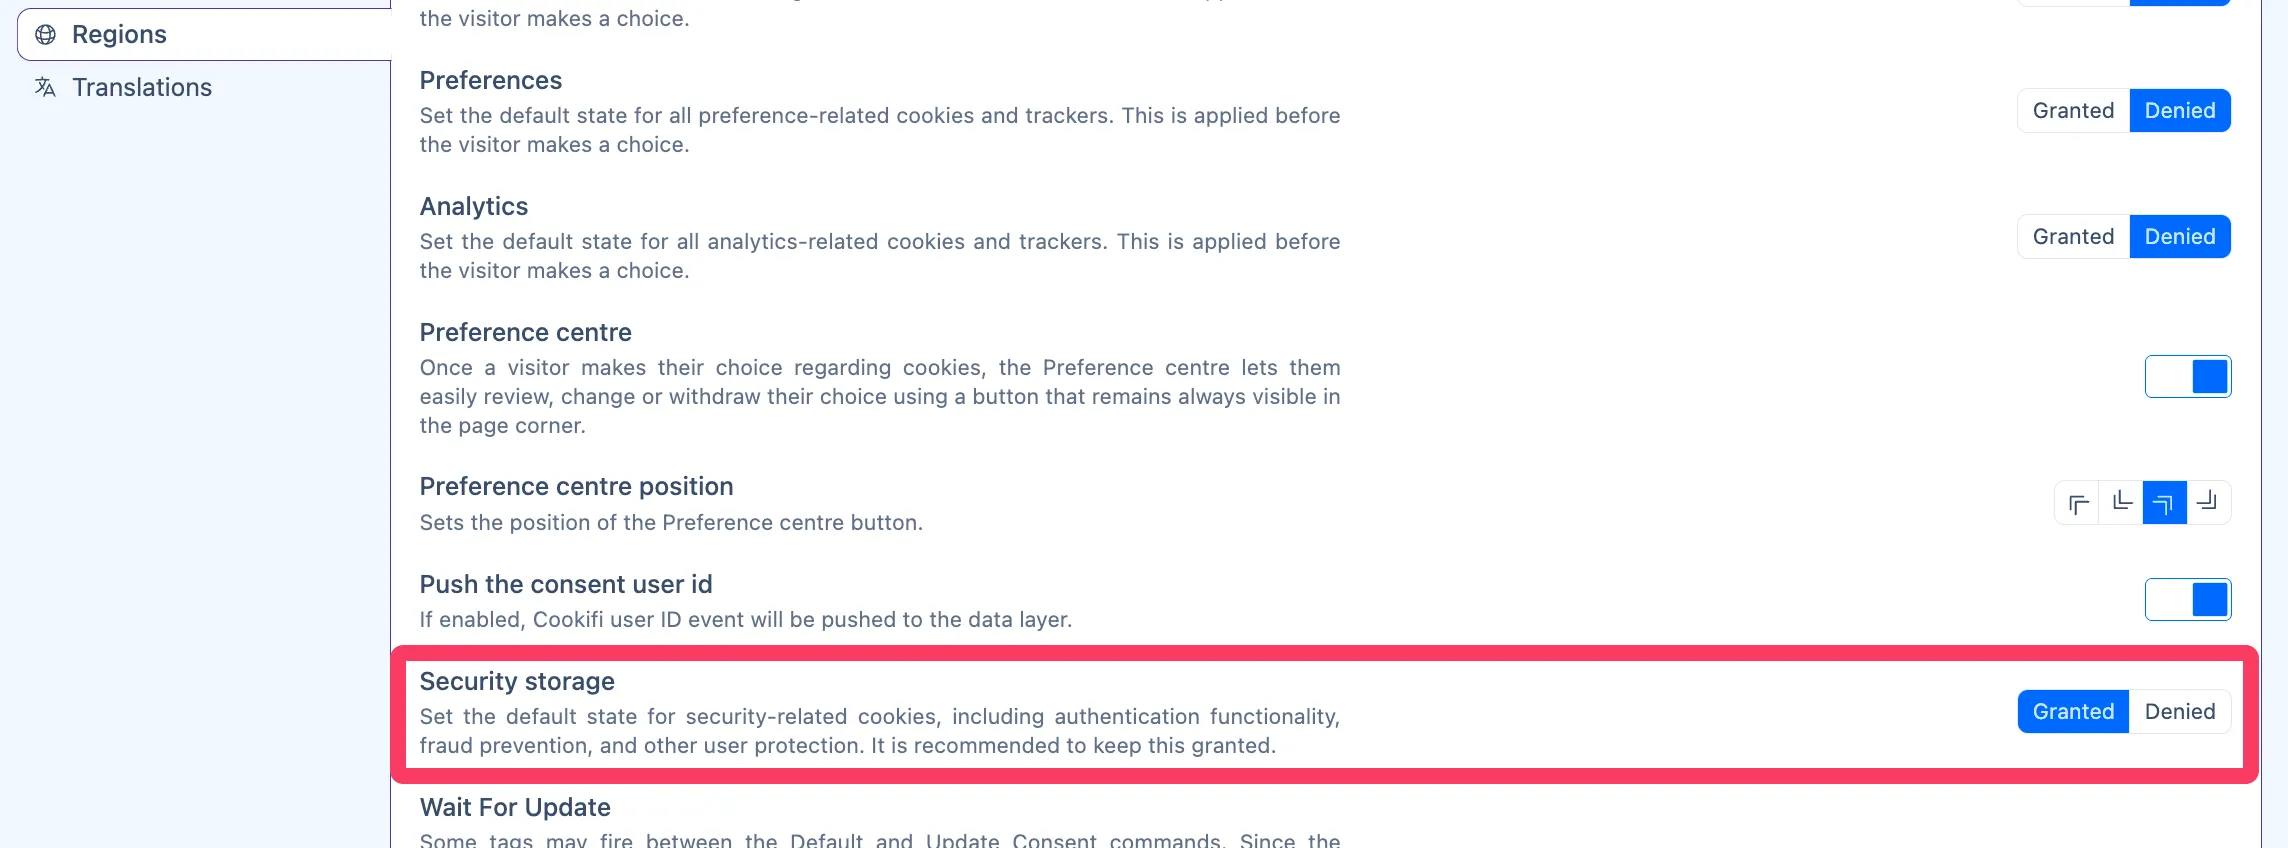
GCM - Security storage
Section titled “GCM - Security storage”Defines whether security-related cookies should be granted or denied by default. It’s recommended to keep this granted.
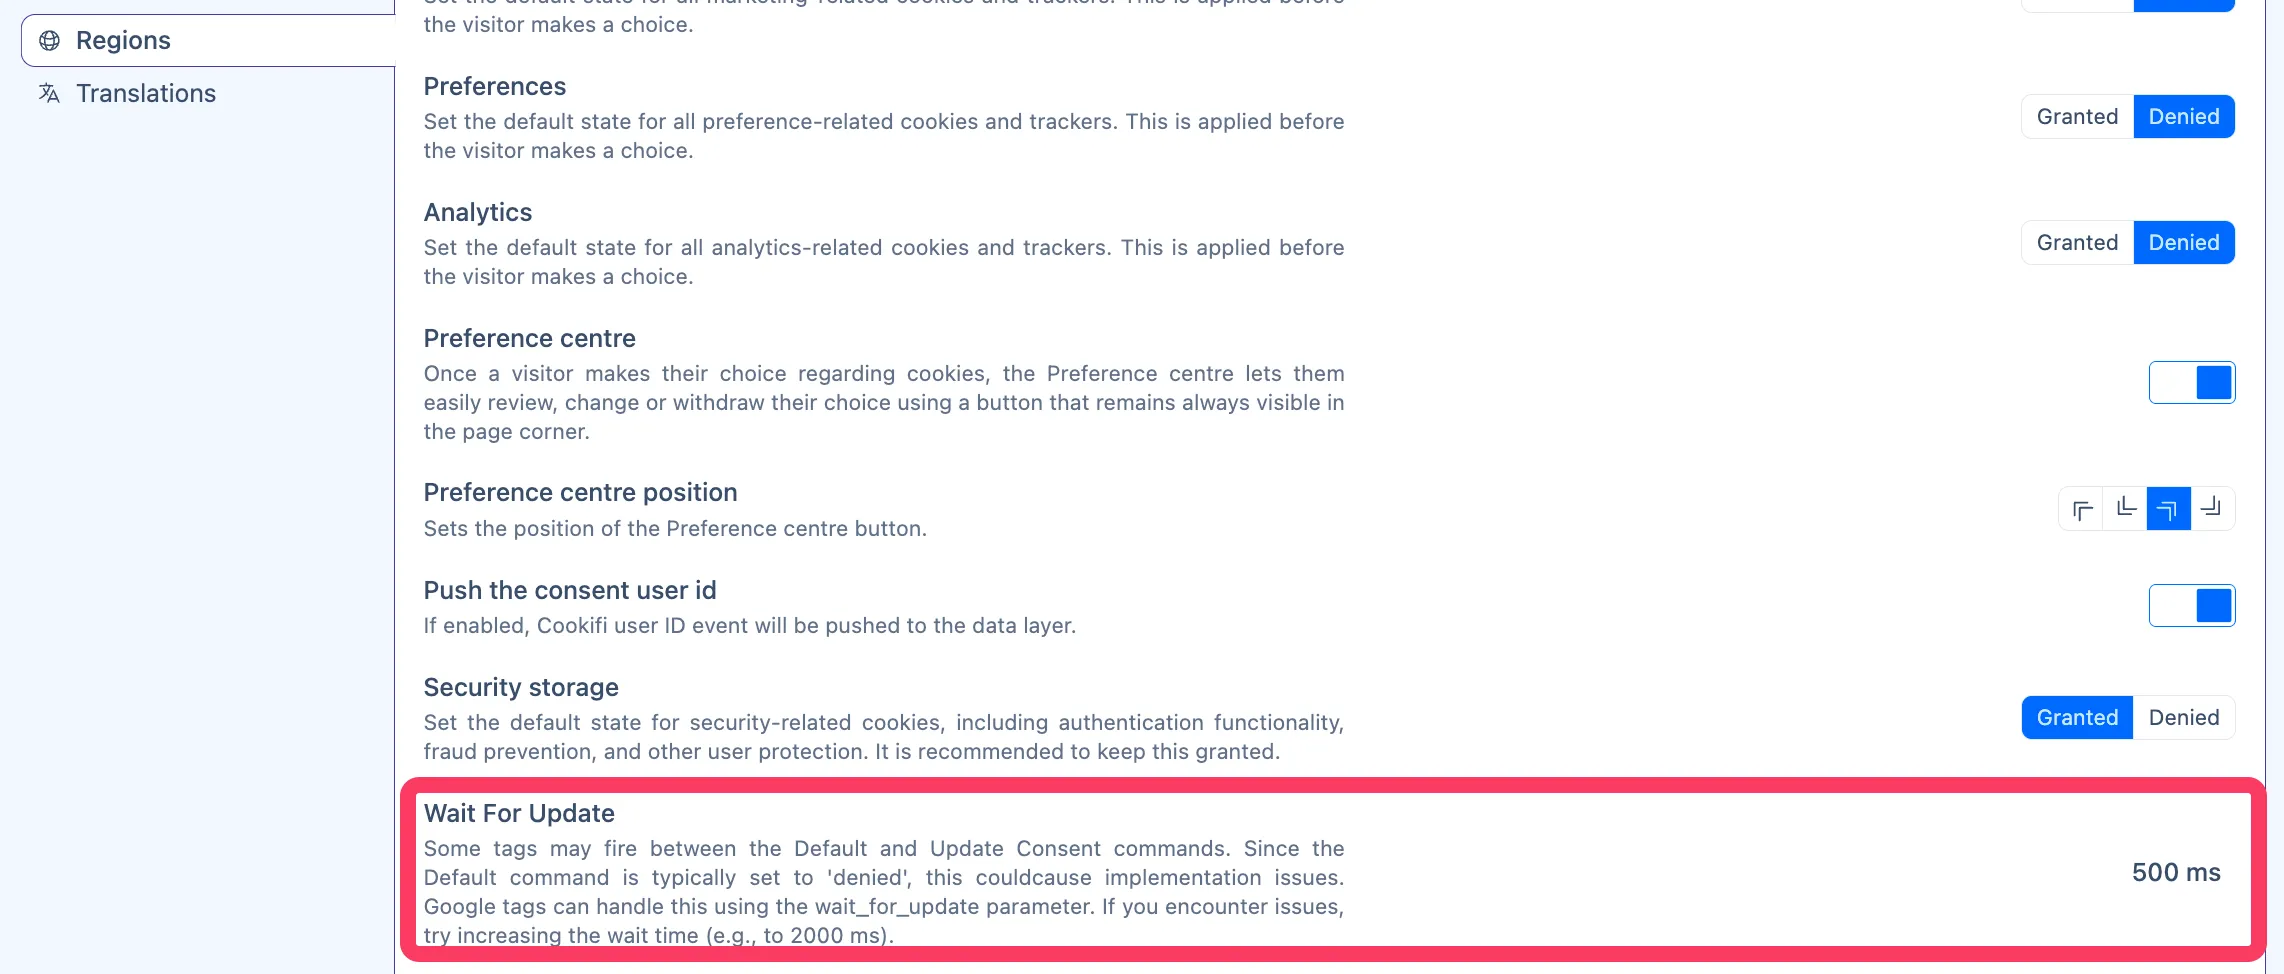
GCM - Wait for update
Section titled “GCM - Wait for update”Some tags may fire between the Default and Update Consent commands. Since the Default
command is typically set to denied, this could cause implementation issues. However, Google tags
can handle this using the wait_for_update parameter:
GCM - Update command
Section titled “GCM - Update command”If you want Cookifi to handle Google Consent Mode’s Update command, keep Send Update Command enabled:
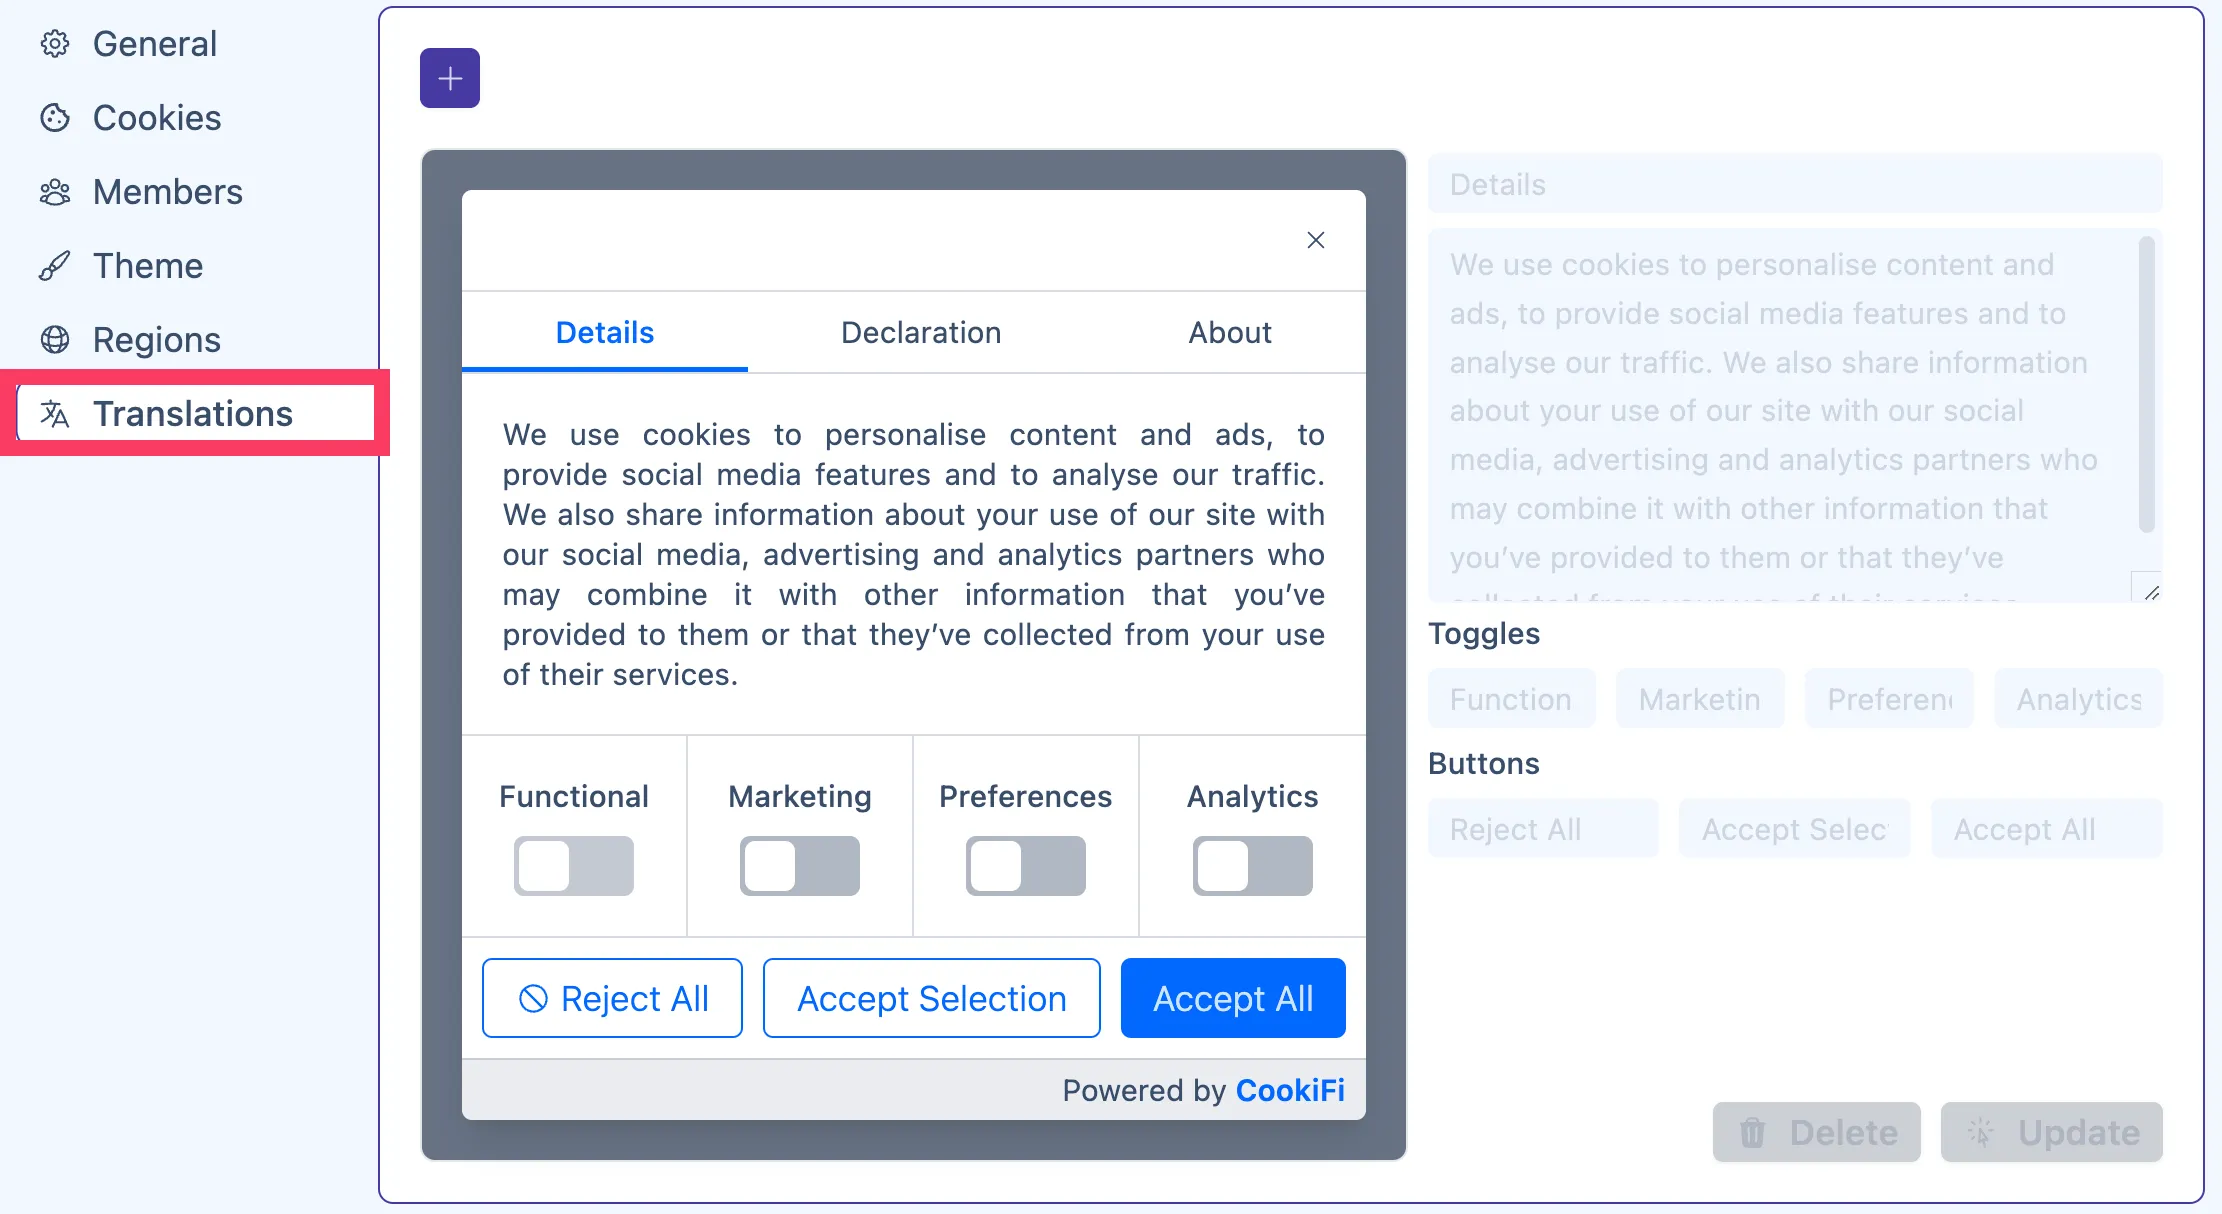
Translations
Section titled “Translations”By default, the Cookifi banner is displayed in English, but you can add translations.
How it works:
When a visitor views your website, Cookifi detects their default language.
- If a custom (created by an admin) translation exists for the detected language, Cookifi displays it.
- If a custom translation does not exist for the detected language, a default translation (created by Cookifi) is used.
- If no translation is available, the default English text is displayed.