Direct installation
HOW? By inserting the Installation script directly into your website’s codebase.
The script doesn’t get affected by ad blockers, allowing to load the cookie banner safely for all visitors. This is the recommended way.
Cookifi is a comprehensive consent management platform that helps you manage website visitors’ consent. It provides tools to help you ensure consent-based tracking and compliance with local regulations.
This guide will walk you through different options of installing Cookifi on your website.
If you’ve already installed Cookifi using the Getting started guide, you can skip this detailed guide and move directly to Configuring your property.
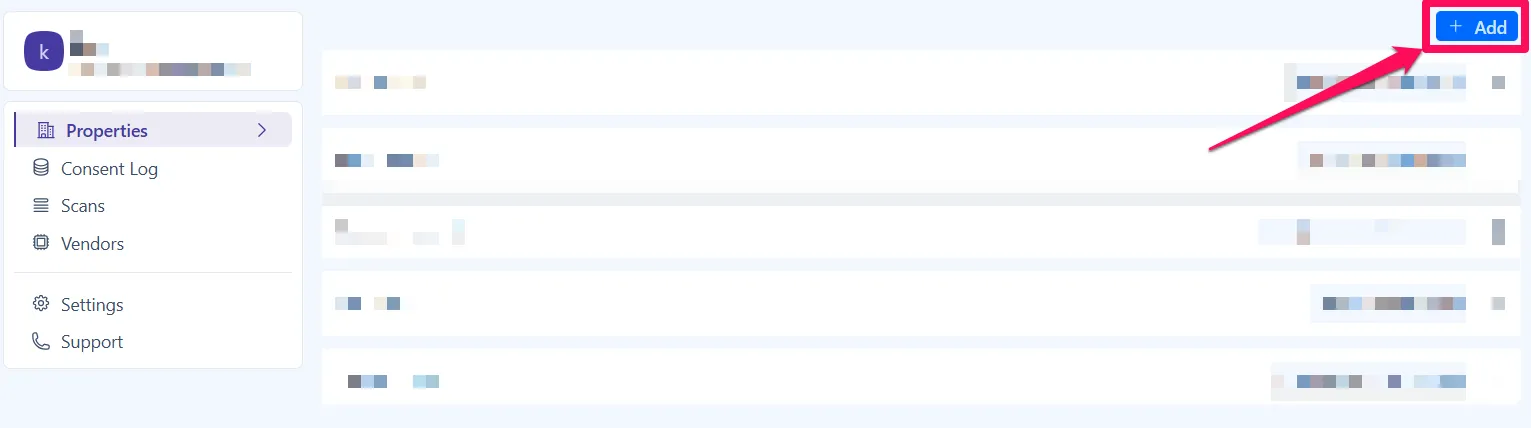
To create a new Cookifi property, click the Add button in your Cookifi admin panel.
This will open the following popup:

Enter the following details:
Click the Create button. Your new property will now appear in the Properties list.
Click on the property you just created to open its settings:
There are two ways to install your Cookifi property on your website:
Direct installation
HOW? By inserting the Installation script directly into your website’s codebase.
The script doesn’t get affected by ad blockers, allowing to load the cookie banner safely for all visitors. This is the recommended way.
Via GTM
HOW? By inserting the Installation script via Google Tag Manager.
Using GTM allows you to implement Cookifi without involving developers, but the cookie banner may not load for visitors using ad blockers, potentially causing compliance issues.
Choose the option that works for you.
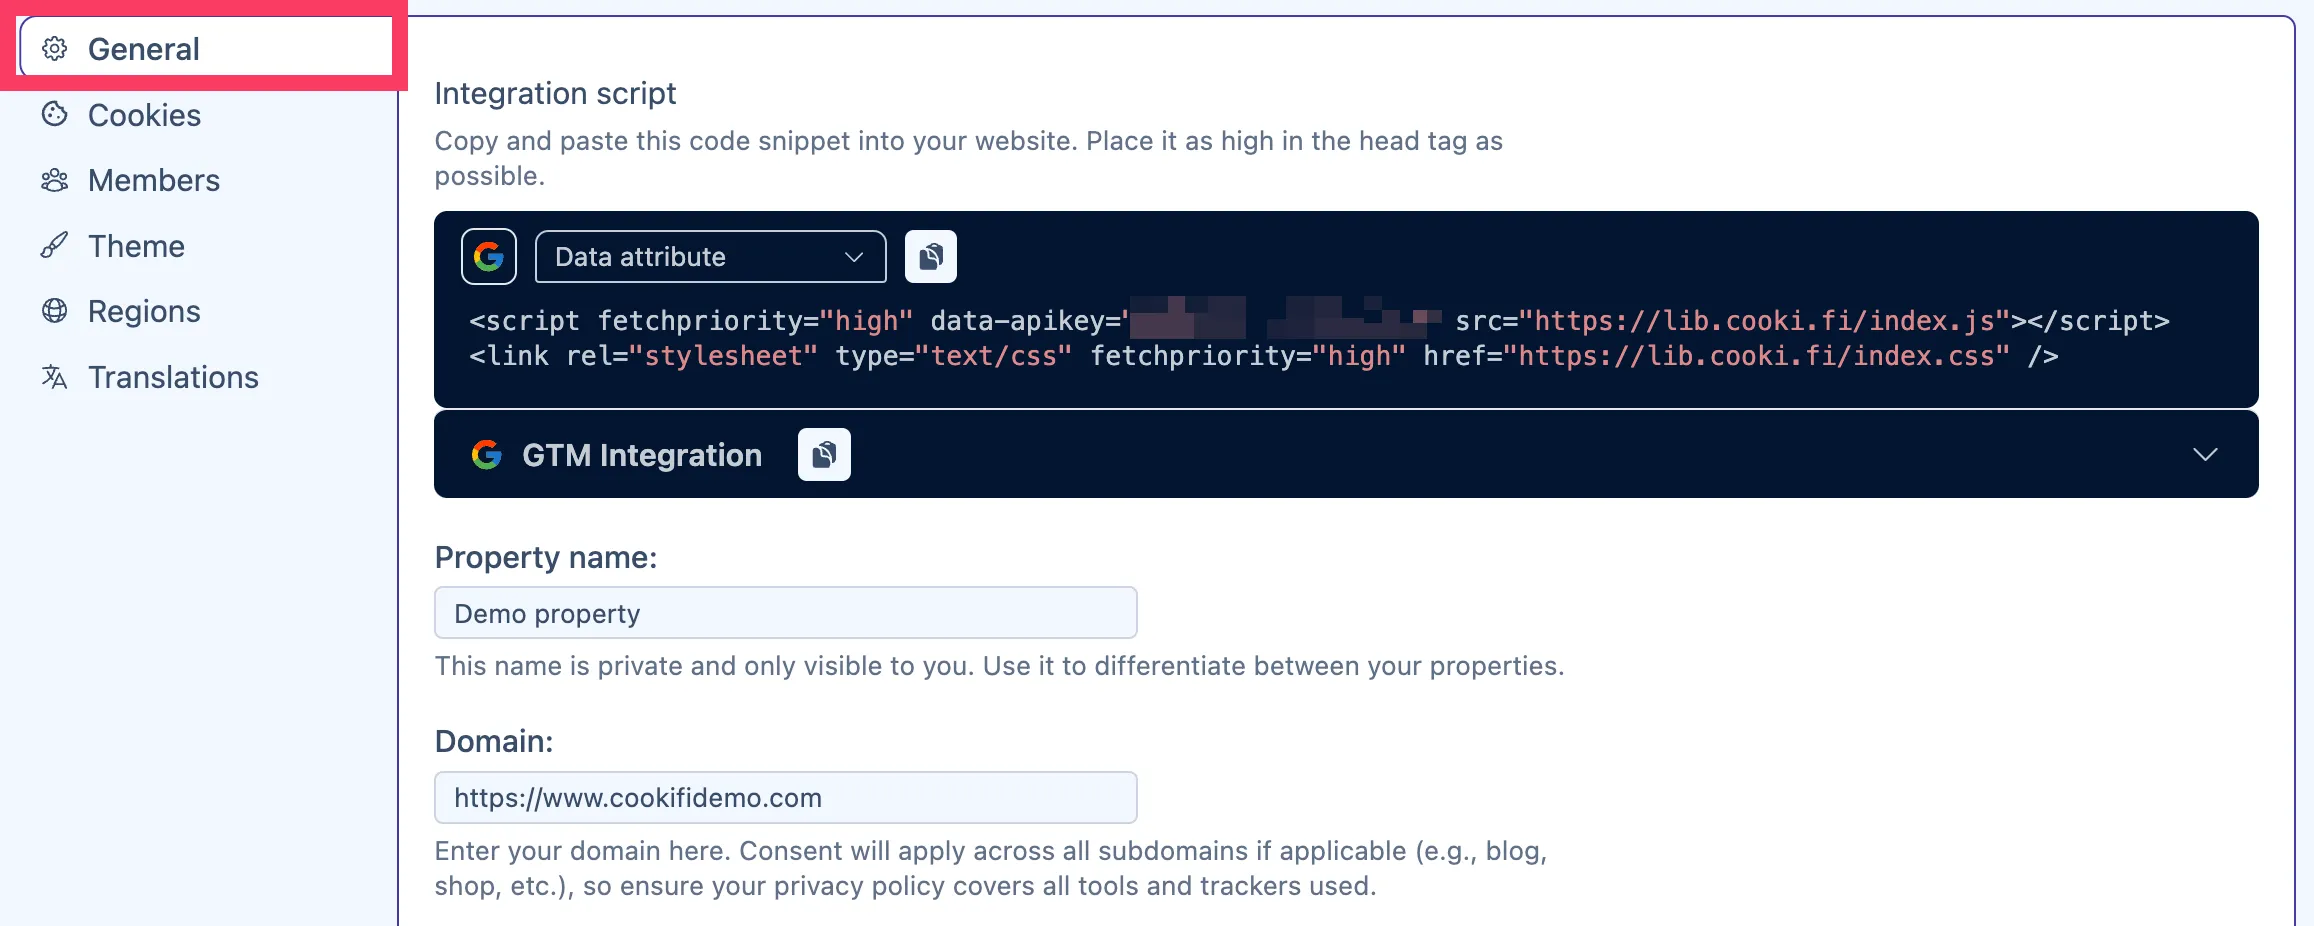
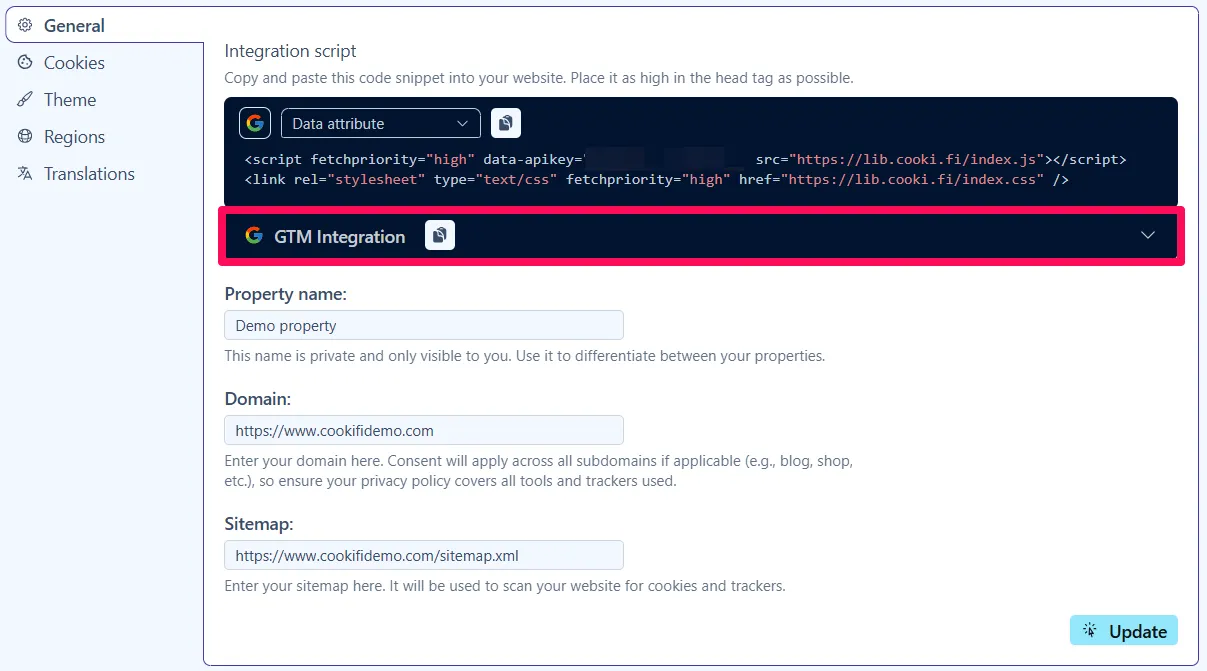
Within the General settings, look for the Installation script section.
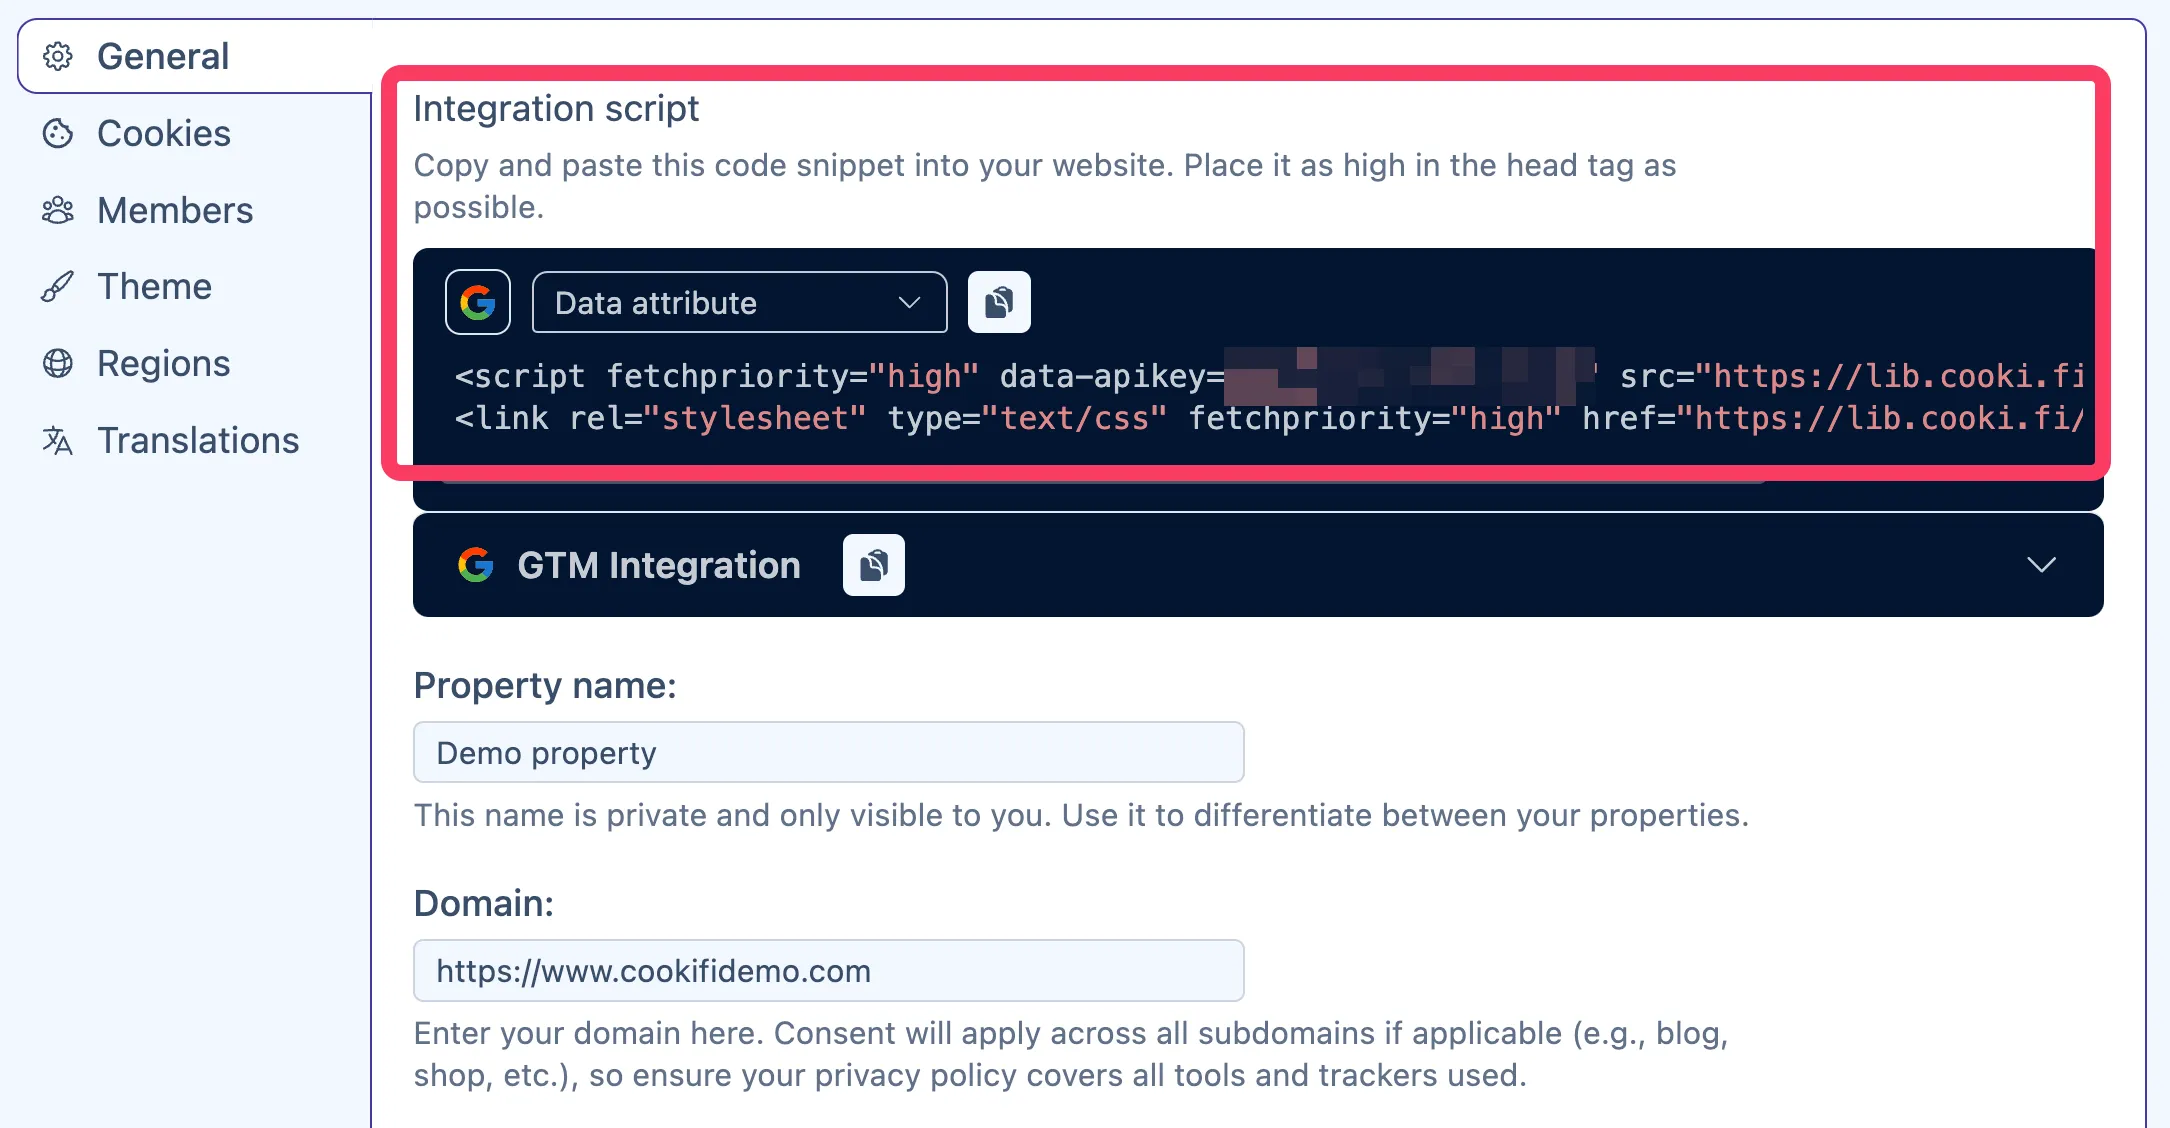
Notice the toggle bar above the script:
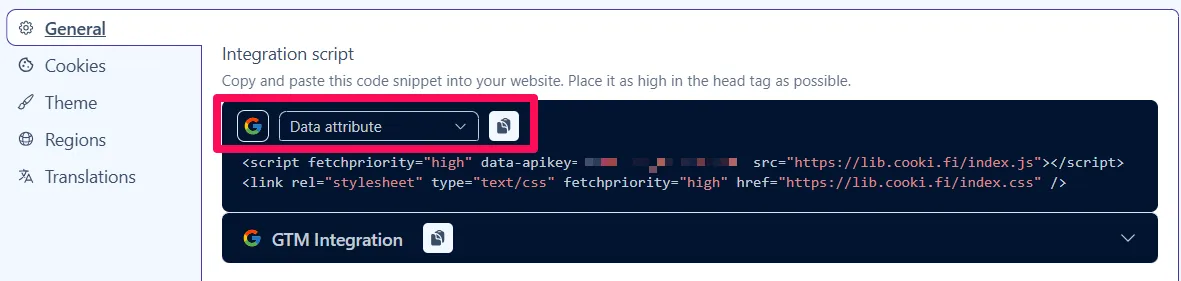
The first icon represents Google Consent Mode’s Default command:

If you want Cookifi to handle the Default command, click that icon:
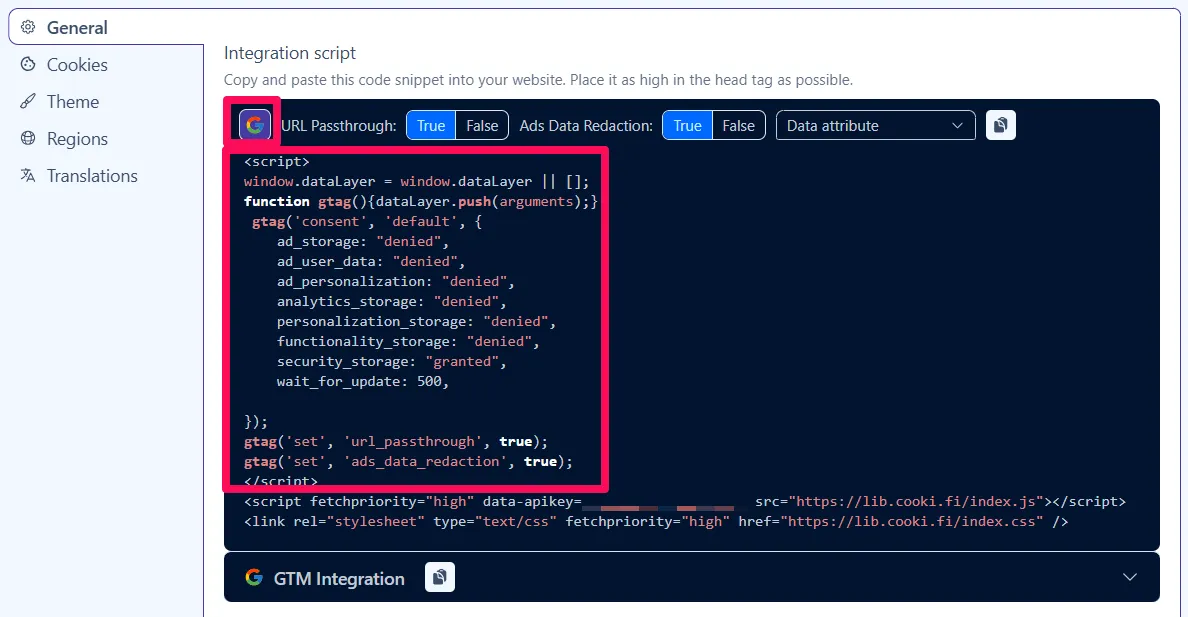
When enabled, the Installation script will include the Default command with your property’s default configuration values. You can modify these values in the Regions settings. We will go through these in the following guide.
When enabled, you can also configure the URL Passthrough and Ads Data Redaction parameters:
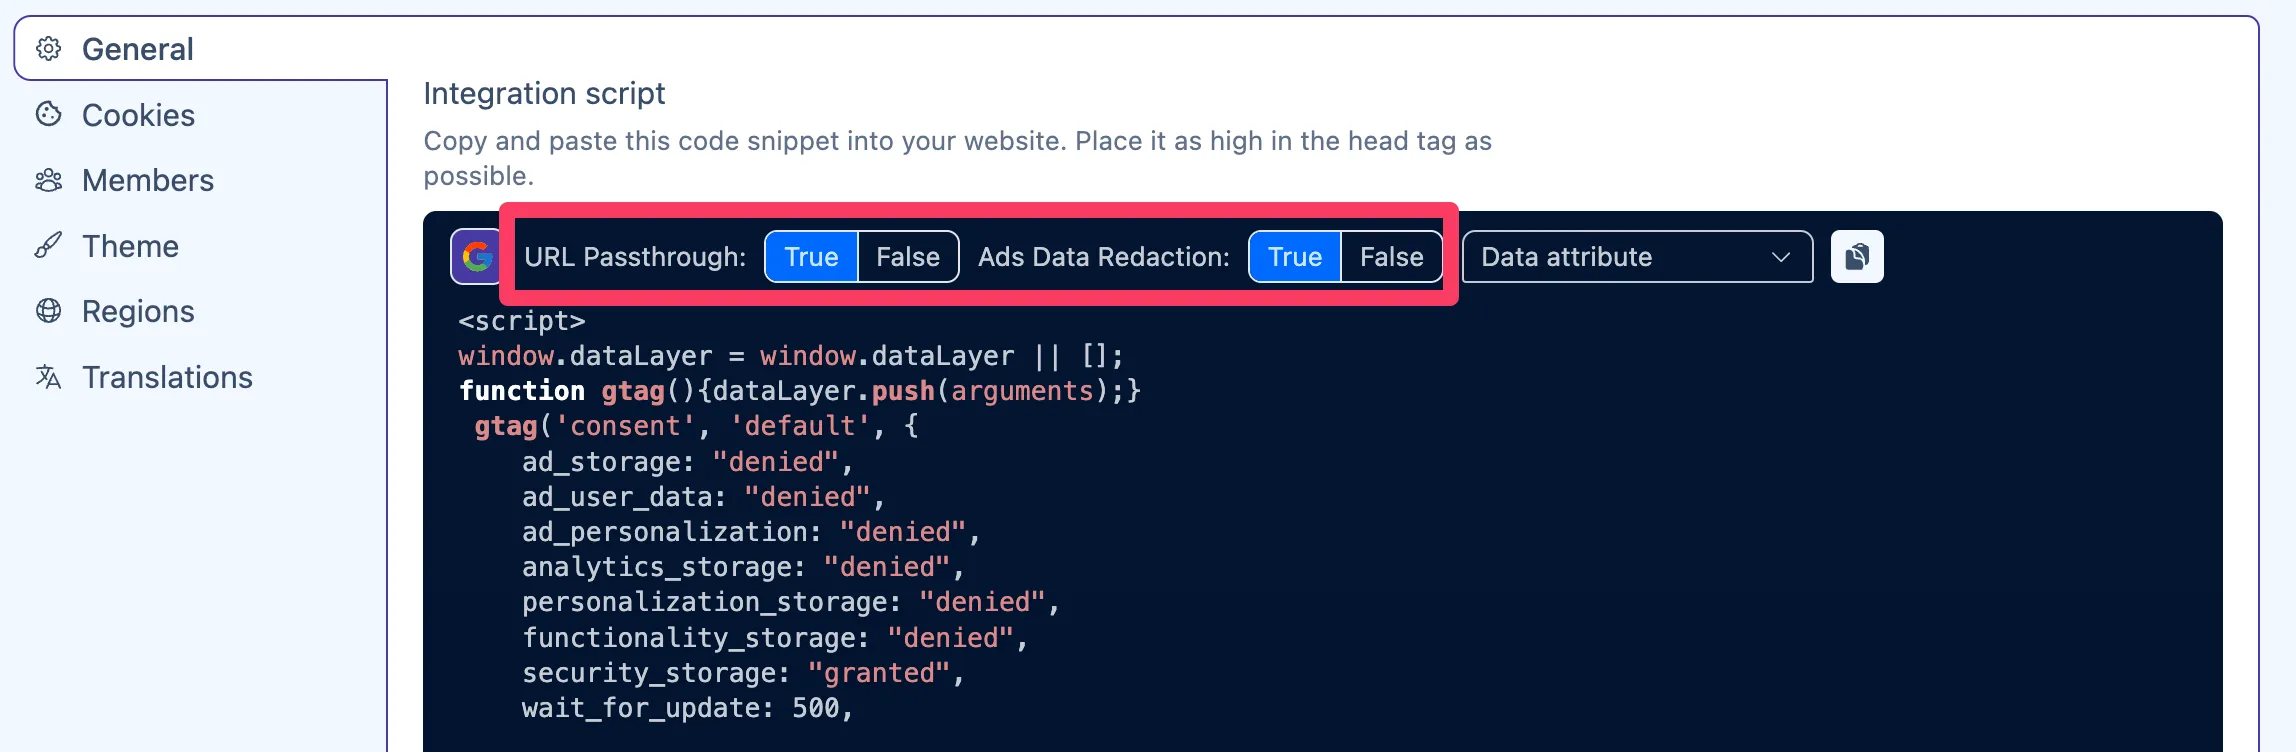
If you don’t know what these mean, you can learn about them in Google Consent Mode.
Once satisfied with the code, copy it:
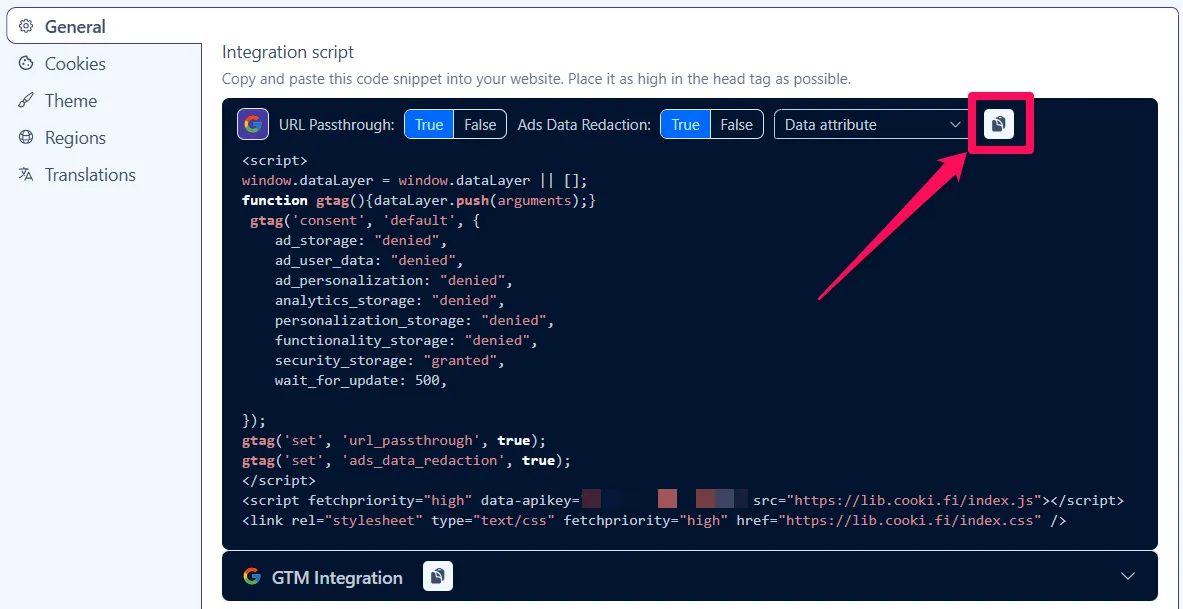
Open your website’s admin panel or code editor, and paste the Installation script as high as
possible within the <head> section. Ensure this code applies to all pages of your website.
Save the changes and visit your website. You should now see the Cookifi cookie banner displayed.
Voilà - you have successfully integrated Cookifi with your website and can skip to the next guide.
Some website platforms (e.g., Go High Level) may strip off the data- attribute from the script,
preventing the banner from loading.
If this happens, return to the Installation script section and toggle to Query string mode:
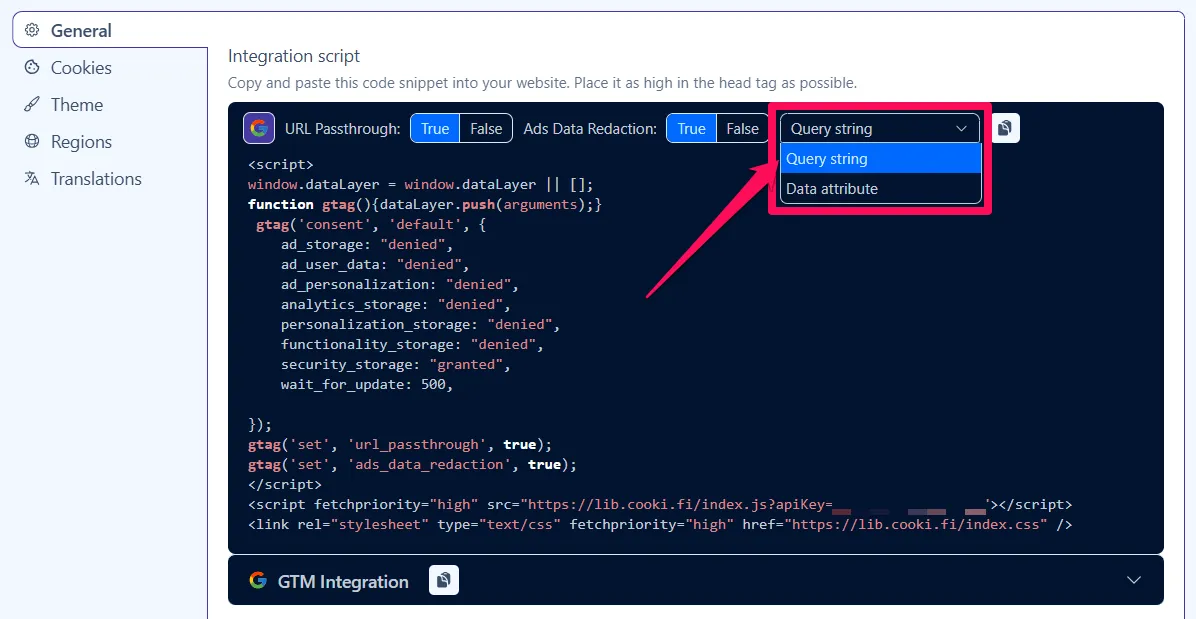
Copy the modified code and replace the old one with it.
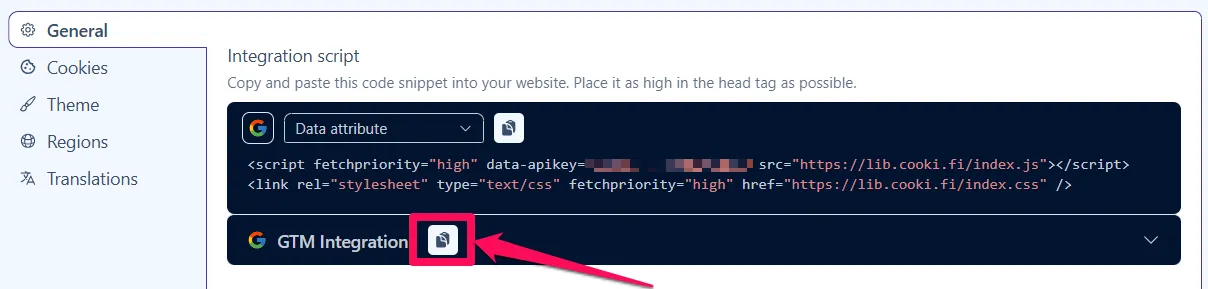
Open the General settings of your property, and look for the GTM Installation script:
Copy the provided code:
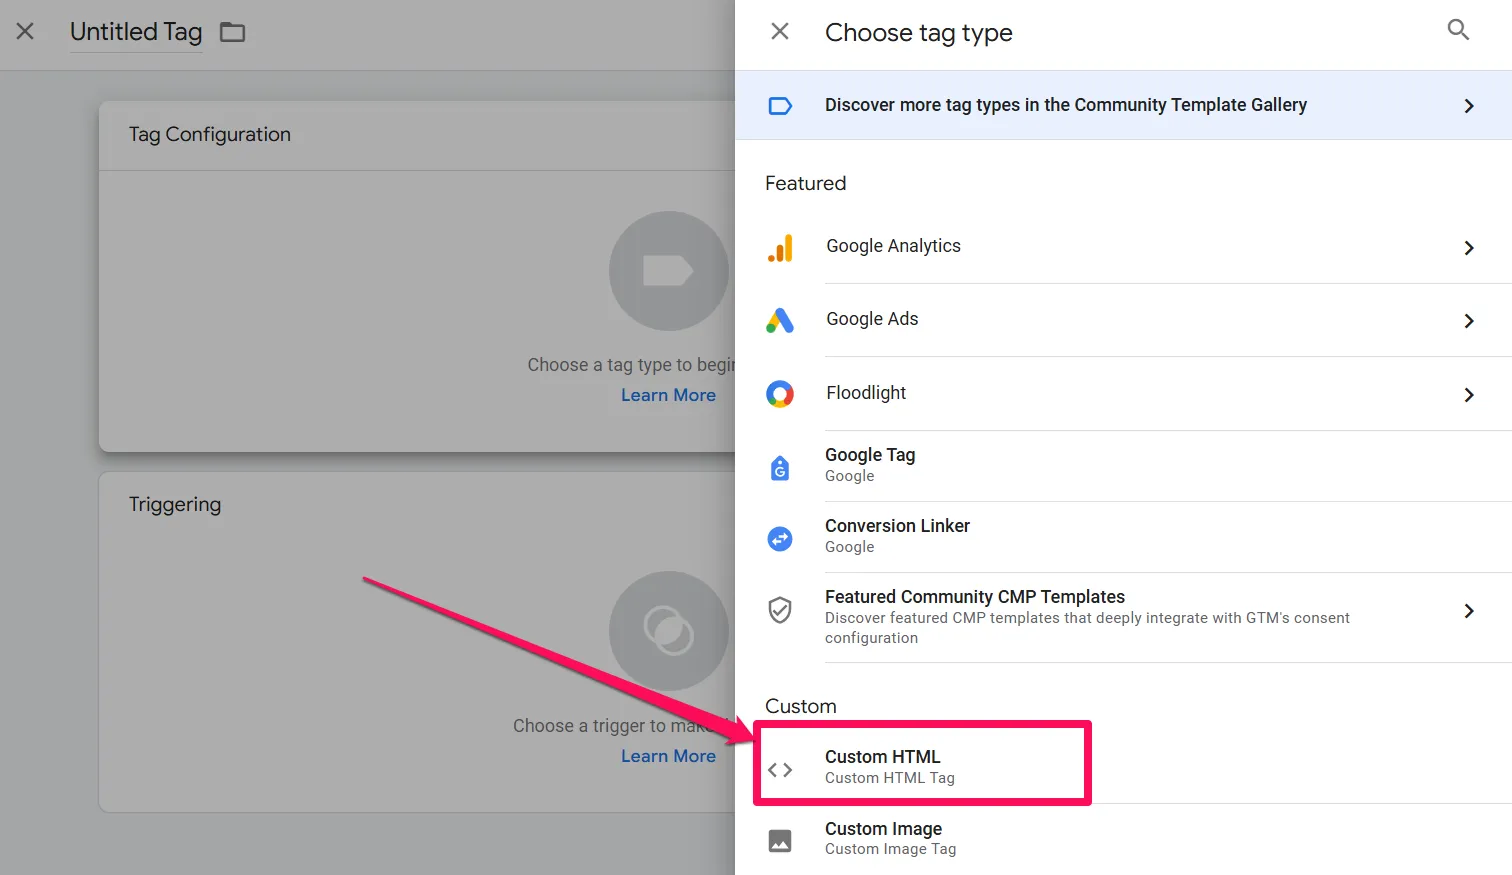
Open your Google Tag Manager container, and create a new Custom HTML tag:
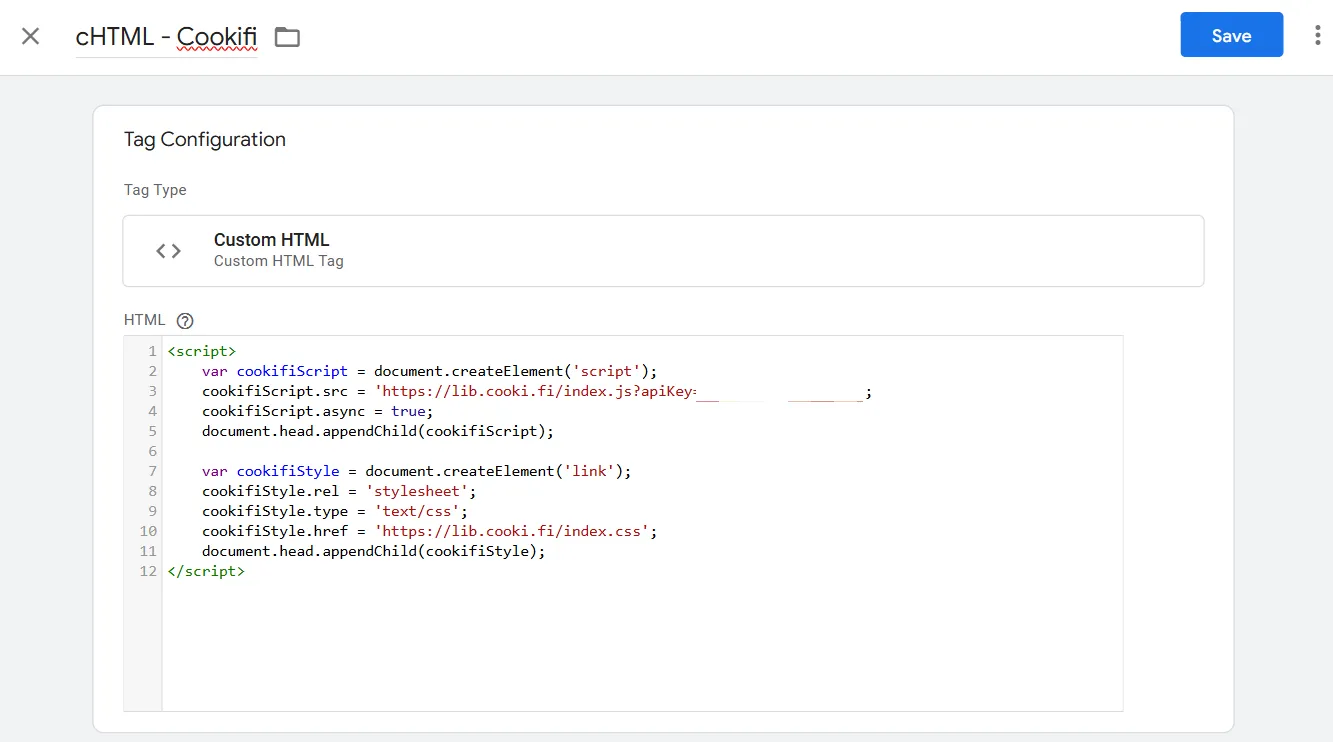
Name the tag appropriately, e.g., cHTML - Cookifi, and paste the GTM Installation script into the HTML section:
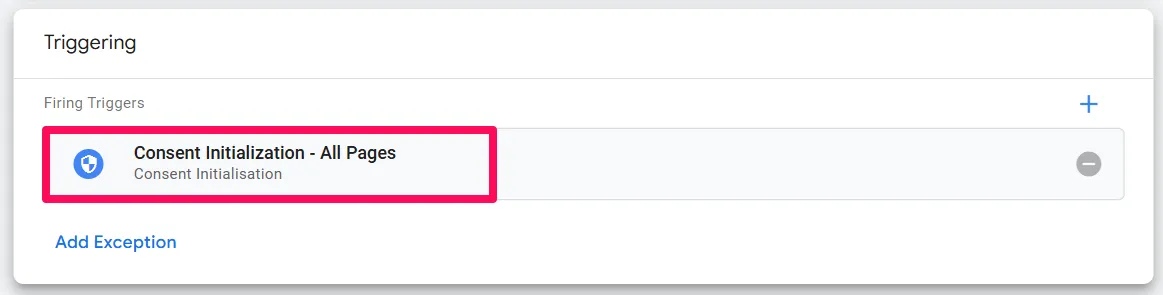
For the trigger, select the Consent Initialization - All Pages:
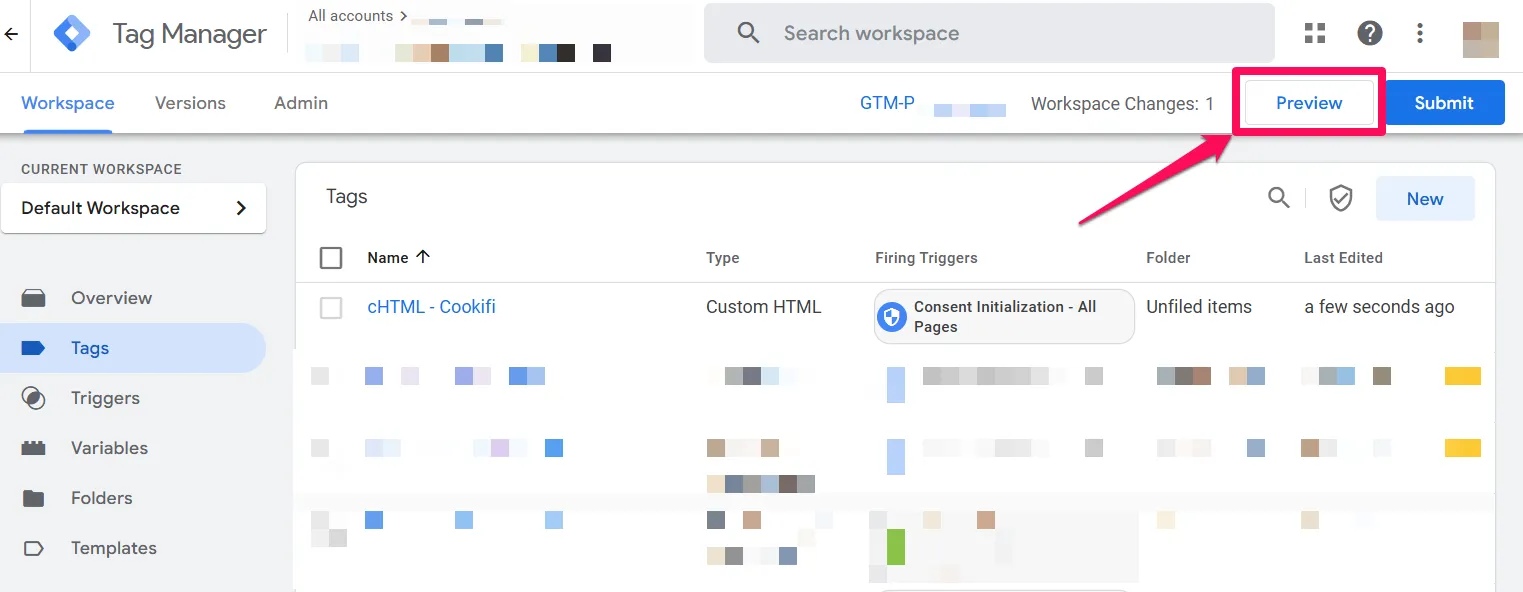
Click Save and Preview your changes:
If you can see the Cookifi cookie banner displayed on your website, you can proceed to Publishing your GTM container:
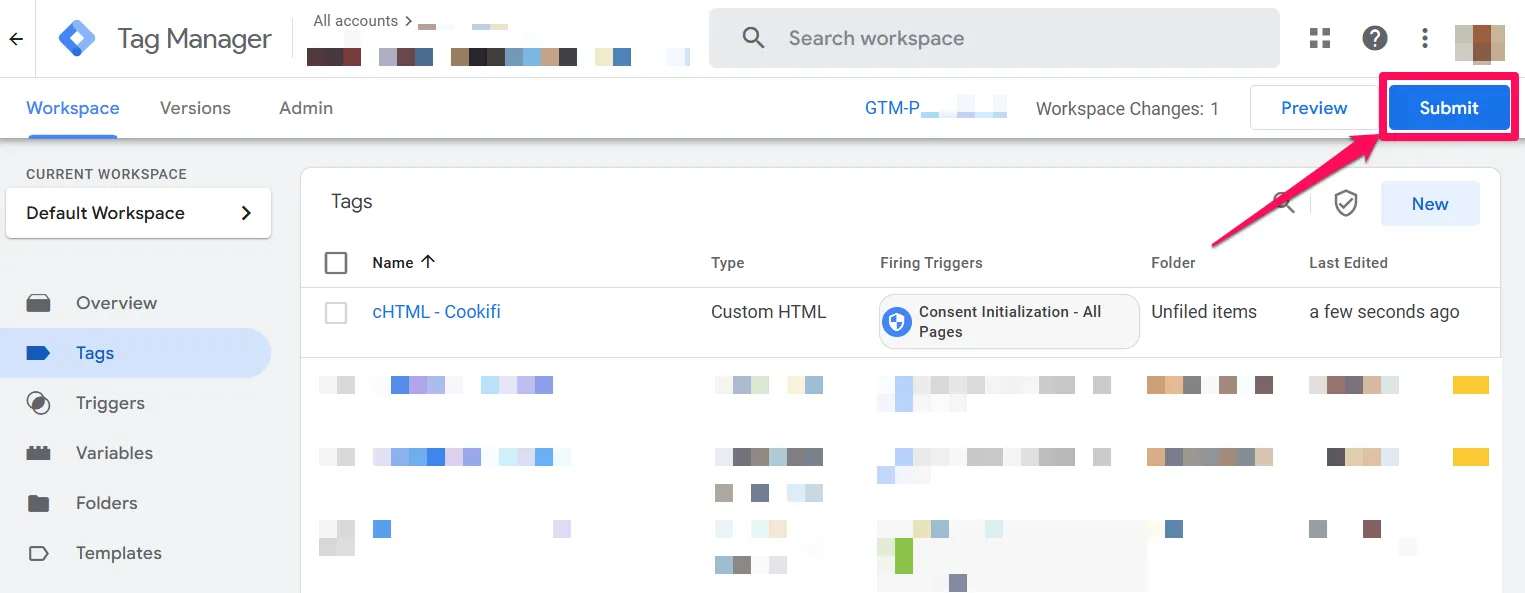
Voilà - you have successfully installed Cookifi with your website.